Vietnamese baguette (banh mi)
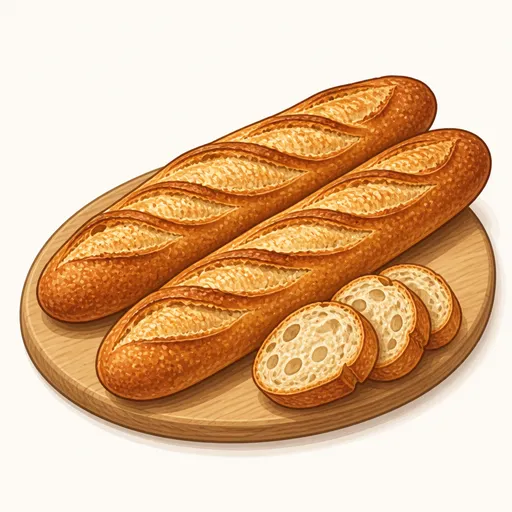
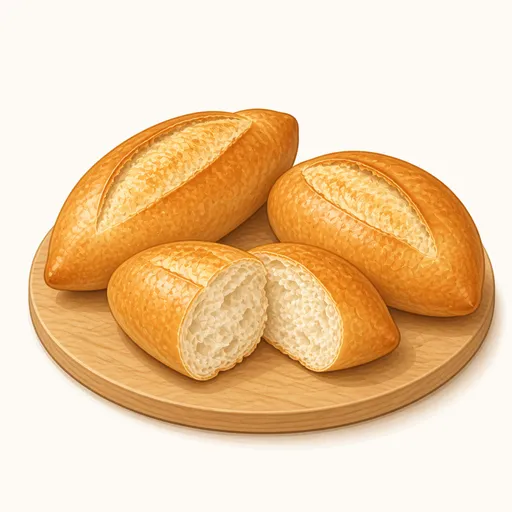
A Vietnamese baguette has a thin, crackly crust that crunches when you tap it and an interior as light and airy as cotton, quite unlike the chewy, dense French baguette. The secret lies in kneading the dough thoroughly, building surface tension as you shape it and baking at high heat with steam.
- Difficulty
- Hard
- Prep
- 40 min
- Cook
- 20 min
- Rising or chilling
- 2 hr 15 min
- Total time
- 3 hr 15 min
- Method
- Oven-baked
Ingredients
Instructions
Step 1
In the bowl of a stand mixer, stir 500 g bread flour with 10 g granulated sugar and 6 g instant yeast, then add 9 g salt off to one side. Slowly pour in 330 g cold water and mix on low speed. Cold water keeps the dough from warming up too quickly during the long knead. The mixture is ready when it comes together in a shaggy mass with no dry flour left.
Step 2
Add 10 g vegetable oil and knead on medium speed for about 12 minutes. Strong gluten is what traps the gas and gives the bread its light, open crumb. The dough is ready when it is silky smooth, elastic and not sticky, and it stretches into a membrane thin enough to see light through.
Step 3
Shape the dough into a ball, place it in a lightly oiled lidded container and let it rise at room temperature for about 60 minutes. This first rise wakes up the yeast and relaxes the dough so it is easy to shape. It is ready when it has grown by one and a half to two times and shows a few small bubbles on the surface.
Step 4
Turn the dough out onto the counter, divide it into eight equal pieces using a scale, roll each into a taut ball and let them rest under a towel for about 15 minutes. Pieces of equal weight bake through at the same time. They are ready when they have softened and stretch without springing back.
Step 5
Roll each ball into an oval, fold the top edge down to the middle and press firmly, fold again, then roll it up and roll the ends so they taper to points, about 20 cm long. A skin as taut as a drum lets each loaf puff up evenly without warping. The loaves are ready when the surface is smooth and tight and the seam is sealed and underneath.
Step 6
Arrange the loaves on a tray lined with parchment paper, cover with a damp towel and proof in a warm place for about 50 minutes; meanwhile, heat the oven to 230°C with a tray of boiling water on the lower rack. The dough needs a full proof so the crust can crackle thinly as it bakes. The loaves are ready when they have doubled, feel weightless when you shake the tray and a gentle press leaves a dent that springs back very slowly.
Step 7
With a sharp razor blade held at about 30 degrees, make one long, shallow cut down the middle of each loaf, then mist the tops evenly with water. The cut lets steam escape exactly where you want, so the loaf bursts open with a pretty ear, while the water keeps the crust thin and crisp. The cut is right when it is about half a centimeter deep and opens slightly right after scoring.
Step 8
Slide the tray into the oven, spray more water onto the oven walls, shut the door right away and bake at 230°C for about 18 to 22 minutes, removing the water tray after the first ten minutes. Steam keeps the crust soft at first so the loaves can rise to their fullest before it dries out. They are done when the crust is golden, the cuts have opened wide and the bottoms sound hollow when tapped.
Step 9
Move the loaves to a wire rack to cool for about 15 minutes in a well-ventilated spot. As they cool, the crust contracts and forms its signature fine cracks. They are ready when a gentle squeeze makes them crackle and the crust no longer feels damp.
Equipment
- Oven
- Baking sheet
- Parchment paper
- Stand mixer
- Mixing bowl
- Bench scraper
- Kitchen scale
- Plastic wrap
- Wire cooling rack
Tips
- Some bakers add a little tapioca starch or rice flour for an even lighter crumb; you can try replacing one tenth of the bread flour.
- If your oven is small, bake four loaves per batch so the hot air circulates evenly.
- For an extra-crisp crust, turn off the oven when the bread is done, crack the door open and leave the loaves inside for five more minutes.
Storage
Banh mi is best on the day it is baked; let it cool in a paper bag rather than a sealed plastic bag, which would soften the crust. Day-old loaves can be crisped up again at 200°C for three to five minutes, or frozen for up to two weeks.
Common problems and how to fix them
- The crust is thick and hard and the crumb is dense.
- The dough was underkneaded or there was not enough steam during baking. Knead until the dough stretches into a thin membrane and put the tray of boiling water in the oven right from the start of preheating.
- The cuts do not open and the loaves split along the sides.
- The dough was overproofed or the cuts were too shallow. Next time, shorten the final proof and score decisively with a very sharp razor blade.
This recipe is based on the common ratios for this bake and is written entirely in our own words.