Rustic country loaf
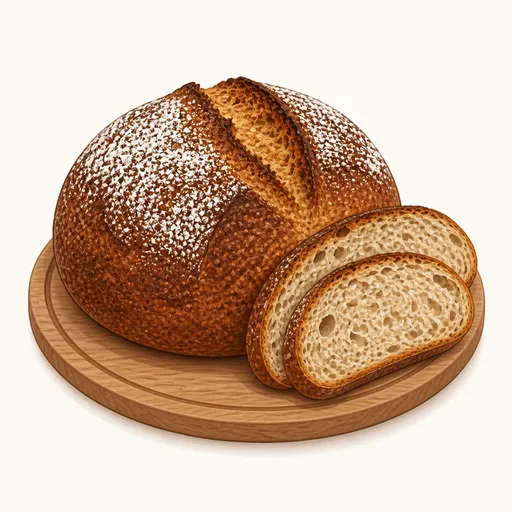
A rustic country loaf is a big round bread with a thick, crackly crust and a moist, open crumb full of irregular holes. The dough proofs slowly overnight in the fridge with very little yeast, which gives it a gentle tang and a deep wheaty flavor, much like sourdough but far easier to make.
- Difficulty
- Medium
- Prep
- 30 min
- Cook
- 45 min
- Rising or chilling
- 15 hr 30 min
- Total time
- 16 hr 45 min
- Method
- Oven-baked
Ingredients
Dough
Flour for the proofing basket
Instructions
Step 1
Mix 430 g bread flour, 50 g whole wheat flour and 20 g rye flour with nearly all of 375 g water, holding back about a tablespoon, then cover the bowl and leave it for 30 minutes. This rest lets the flour absorb the water and the gluten start forming on its own with very little kneading. The dough is ready when it feels noticeably softer and stretches when pulled gently instead of tearing.
Step 2
Sprinkle 10 g salt and 2 g instant yeast over the dough, add the reserved water and squeeze and pinch the dough with wet hands for about three minutes until evenly mixed. Squeezing by hand works the salt and yeast into the wet dough without tearing the gluten. It's ready when you can no longer feel any grains of salt and the dough has come back together into one mass.
Step 3
Over the next two hours, every thirty minutes, dip your hand in water, pull one edge of the dough up high and fold it over to the middle, then turn the bowl and repeat four times for each round. Stretching and folding replaces kneading, giving the wet dough structure while keeping its big air pockets. The dough is ready when it is smooth and taut, has grown by about half and shows bubbles along the side of the bowl.
Step 4
Tip the dough onto a lightly floured counter, fold the edges into the middle, then flip it over and drag it toward you a few times to tighten the surface into a round, and set it smooth side down in a towel-lined basket or bowl dusted with to taste rice flour. Rice flour doesn't absorb water, so the dough won't stick to the towel. It's ready when it is round and taut like a ball and holds its shape when left alone.
Step 5
Cover the basket well and put it in the fridge for 12 to 14 hours. A slow, cold proof develops a mild tang and makes the dough easier to score. It's ready when it has clearly puffed up more and a fingertip dent springs back very slowly.
Step 6
Put a lidded cast-iron Dutch oven in the oven and preheat to 250°C for about 45 minutes. The hot pot traps steam from the dough, creating a humid environment that lets the loaf spring up before the crust sets. It's hot enough once it has been in the oven at full temperature for at least forty minutes.
Step 7
Turn the cold dough out onto a sheet of parchment paper and use a razor blade to make one long, confident slash about 1 cm deep at a slight angle across the top. The slash guides how the bread expands and creates the crisp ear that is its signature. It's ready when the cut is clean and opens slightly right after slashing.
Step 8
Carefully lift the dough by the parchment into the hot pot, cover it and bake at 250°C for 20 minutes. The steam trapped in the pot keeps the crust soft so the loaf can rise to its full height. This stage is done when you lift the lid and see that the loaf has risen tall and the slash has opened wide, but the crust is still pale.
Step 9
Remove the lid, lower the oven to 230°C and bake for another 20 to 25 minutes. The dry air turns the crust a deep brown and makes it crisp and hard. The bread is done when the crust is as dark as a chestnut, the bottom sounds hollow when tapped and a thermometer in the center reads about 96°C.
Step 10
Set the loaf on a wire rack and let it cool for at least an hour before slicing. The crumb is still cooking from the heat inside, and cutting too soon leaves it gummy and damp. It's ready when the bottom is completely cool and the crust crackles softly as it cools.
Equipment
- Oven
- Deep skillet
- Mixing bowl
- Bench scraper
- Kitchen scale
- Parchment paper
- Plastic wrap
- Wire cooling rack
Tips
- If you don't have a Dutch oven, bake on a hot baking sheet and set a pan of boiling water on the rack below to create steam.
- Use cool water in summer and slightly warm water in winter so the dough ferments at a steady pace.
- Weigh the yeast and salt very precisely, since even a small difference noticeably affects the result.
Storage
Keep the loaf whole in a paper bag or cut side down on a cutting board, and it stays good for about three days. You can slice and freeze it for up to a month, then simply toast the slices in the oven or a toaster.
Common problems and how to fix them
- The loaf spreads out and flattens when turned out of the basket.
- The dough overproofed or wasn't shaped tightly enough. Shorten the cold proof and shape more carefully so the surface is really taut.
- The crumb is dense with gummy, damp streaks.
- The dough didn't get enough stretch and folds or the bread was cut while still hot. Do all the rounds of stretching and folding, and wait patiently until the loaf has cooled completely.
This recipe is based on the common ratios for this bake and is written entirely in our own words.