Pull-apart garlic bread
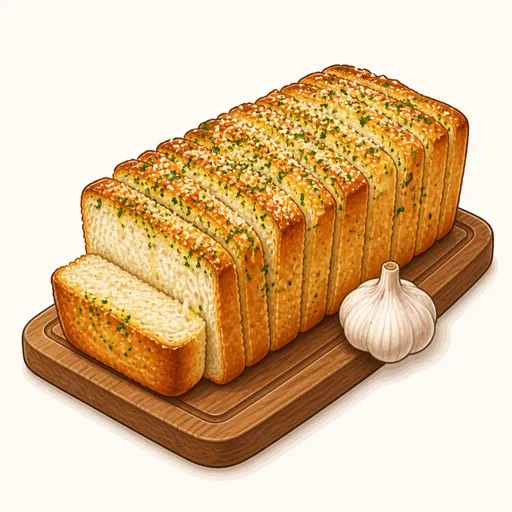
This soft loaf is cut into squares, spread with fragrant garlic butter and stacked upright in the pan to bake. When it comes out of the oven, you just pull it apart layer by layer with your hands, and every layer is soaked in butter, crisp at the edges and soft inside. It's perfect with soup or pasta, or for bringing to a party.
- Difficulty
- Medium
- Prep
- 40 min
- Cook
- 35 min
- Rising or chilling
- 1 hr 50 min
- Total time
- 3 hr 5 min
- Method
- Oven-baked
Ingredients
Dough
Garlic butter
Instructions
Step 1
Put 400 g bread flour, 30 g granulated sugar and 6 g instant yeast in the mixer bowl and stir them together dry, then add 7 g salt on the opposite side from the yeast and pour in 240 g warm whole milk and 50 g eggs. Keeping the salt away from the yeast at first stops it from weakening the yeast. Knead on low speed for about five minutes, until the dough comes together into a slightly sticky mass.
Step 2
Add 40 g softened unsalted butter to the dough and knead on medium speed for about ten minutes. Adding the butter later gives the gluten time to form first, so the crumb is soft yet chewy and pulls apart in strands. The dough is ready when it's silky smooth, clears the sides of the bowl and stretches into a thin, slightly translucent windowpane without tearing right away.
Step 3
Shape the dough into a ball, place it in a lightly oiled bowl, cover with plastic wrap and let it rise somewhere warm for about an hour. The first rise lets the yeast produce gas and develop the bread's flavor. The dough is ready when it has doubled and a finger poke leaves a dent that stays put.
Step 4
While the dough rises, melt 100 g unsalted butter over low heat, add 25 g cloves of minced garlic and stir for about a minute, then turn off the heat and mix in 8 g finely chopped mixed fresh herbs, 30 g grated Parmesan and a pinch salt. Gently cooking the garlic in butter mellows its sharpness and spreads its aroma. The garlic butter is ready when the garlic has just turned straw-colored, without browning at all.
Step 5
Punch down the dough, roll it into a rectangle about one centimeter thick, spread half of the garlic butter evenly over the top, then use a knife to cut the dough into squares about six centimeters on each side. Squares of the same size bake evenly in the pan. You'll end up with about thirty glossy, buttery squares flecked with herbs.
Step 6
Stack four or five squares on top of each other, then stand the stacks on their sides, packed close together, in a parchment-lined 23 cm loaf pan. Standing them upright lets the heat reach into every layer and creates lots of crisp edges as it bakes. The pan is ready when the stacks lean snugly against each other with a little room left for the dough to rise.
Step 7
Cover the pan with a towel and let it rise somewhere warm for about forty minutes more, preheating the oven to 180°C at the same time. This rise helps the layers stick together while still letting them pull apart later. The dough is ready when it has risen nearly to the rim of the pan and the layers look slightly puffy.
Step 8
Bake at 180°C for about 30 to 35 minutes, laying a sheet of foil over the top after about twenty minutes if it's browning too quickly. The center of the loaf is thick, so it needs enough time to bake all the way through. The bread is done when the top is a deep golden brown, it sounds hollow when tapped and the center reaches about 90°C.
Step 9
Leave the bread in the pan for about ten minutes, then turn it out onto a plate and brush the remaining garlic butter over the top while it's still hot. A short rest lets the crumb set so it doesn't turn gummy when you pull it apart. It's ready when the butter has soaked into the top and the layers pull away easily.
Equipment
- Oven
- Loaf pan
- Stand mixer
- Small saucepan
- Rolling pin
- Bench scraper
- Pastry brush
- Kitchen scale
- Plastic wrap
Tips
- For something even richer, sprinkle a little mozzarella between the stacks before arranging them in the pan.
- Parsley, scallions or dried thyme all go well with garlic butter, so use whatever you have in the kitchen.
- Use milk warmed to about 35°C; anything hotter will kill the yeast and the dough won't rise.
Storage
The bread is best on the day it's baked. You can wrap it tightly and keep it at room temperature for one day, or freeze it for up to a month; to serve, wrap it in foil and reheat at 170°C for about ten minutes so the butter melts and the edges crisp up again.
Common problems and how to fix them
- The center of the loaf is still wet and sticky even though the top is golden.
- The stacks were packed too tightly, so the heat had trouble reaching the center. Next time, arrange them a little more loosely, cover with foil earlier and bake for an extra five to seven minutes.
- The garlic tastes bitter and there are black specks on top of the bread.
- The garlic was cooked over too high a heat or sat exposed on top of the bread during baking. Warm the garlic in the butter only very briefly, and put most of the garlic butter between the layers rather than on top.
This recipe is based on the common ratios for this bake and is written entirely in our own words.