Pain au chocolat
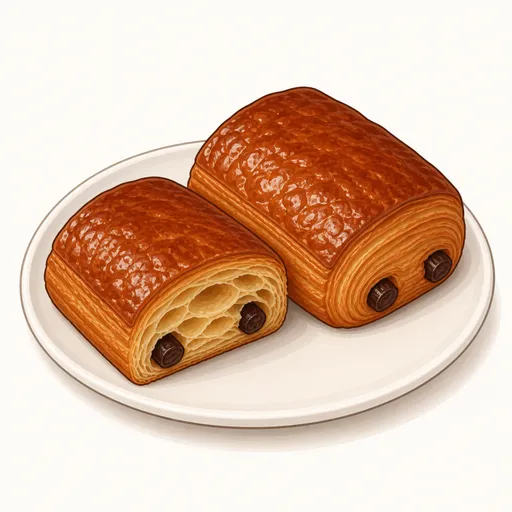
Pain au chocolat is the rectangular French croissant rolled around two batons of dark chocolate. The outside is shatteringly crisp, the inside opens into hundreds of thin, buttery layers, and the chocolate melts softly while the pastry is still warm. The laminating takes time, but the result is well worth it for a weekend breakfast.
- Difficulty
- Very hard
- Prep
- 2 hr
- Cook
- 20 min
- Rising or chilling
- 12 hr
- Total time
- 14 hr 20 min
- Method
- Oven-baked
Ingredients
Dough
Butter block
Chocolate batons
Egg wash
Instructions
Step 1
Put 500 g bread flour, 55 g granulated sugar, 10 g salt and 7 g instant yeast in the bowl of a stand mixer, add 150 g cold water, 130 g cold whole milk and 40 g softened unsalted butter, and knead on low speed for about five minutes. The dough needs only moderate kneading, because the folding later will keep developing the gluten. The dough is ready when it is smooth and a little tacky but not yet truly elastic.
Step 2
Press the dough into a flat rectangle of about 20 by 25 cm, wrap it well and refrigerate for about eight hours or overnight. A slow, cold rest lets the yeast develop flavor and gets the dough cold enough to roll out with the butter. The dough is ready when it has risen slightly, is evenly cold and bends easily.
Step 3
Place 250 g cold unsalted butter between two sheets of parchment, pound it flat with a rolling pin, then roll it into a 17 cm square and refrigerate for about fifteen minutes. The butter needs to be pliable but still cold so it spreads evenly without melting. The butter block is ready when it bends without breaking and its surface is flat.
Step 4
Roll the dough into a square twice the size of the butter block, set the butter in the middle turned on the diagonal, then fold the four corners of dough over it to enclose it completely and pinch the seams tightly. Sealing the butter in keeps it from squeezing out as you roll. This step is done when the butter sits neatly inside like a sealed envelope.
Step 5
Roll the dough into a long strip three times as long as it is wide, brush off the excess flour, then fold it in thirds like a letter, wrap it and refrigerate for thirty minutes. Each letter fold triples the number of butter and dough layers. The turn is right when the edges are straight and no butter shows through.
Step 6
Rotate the dough ninety degrees so the folded edge is on your left, roll it out long again, fold it in thirds and chill for thirty minutes. Changing direction stretches the gluten evenly both ways so the pastries do not turn out lopsided. The dough is right when it rolls out easily without springing back hard.
Step 7
Make the third and final letter fold the same way, wrap well and refrigerate for an hour. The longer rest lets the dough relax completely before you roll it thin for cutting. The dough is ready when it is cold and firm and does not dent deeply when pressed.
Step 8
Roll the dough into a rectangle about four millimeters thick, trim the edges cleanly, then cut it into sixteen rectangles of about 8 by 13 cm with a sharp knife. A sharp, decisive cut keeps the layers at the edges from sticking together, so the pastry rises in tiers. This step is done when the pieces are all the same size and the cut edges clearly show the layers.
Step 9
Divide 150 g dark chocolate into small batons, lay one baton at a short edge of a dough rectangle, roll it over once, add a second baton and roll up the rest of the way, leaving the seam underneath. Keeping the seam on the bottom stops the pastry from unrolling as it rises. The pastries are ready when they are neatly rolled, the chocolate shows at both ends, and they are spaced apart on the baking sheet.
Step 10
Cover the pastries loosely and proof in a warm spot at about 26°C for about two hours; do not let it get any warmer or the butter will melt out. The yeast needs time to puff the pastries up so the crumb turns light and airy. They are ready when they have grown by half, jiggle when you shake the tray and show clear layers at both ends.
Step 11
Preheat the oven to 190°C about twenty minutes before the pastries finish proofing. A fully hot oven turns the water in the butter to steam right away, which separates the layers of dough. The oven is ready when the temperature has held steady at the set point.
Step 12
Beat 50 g eggs with 10 g whole milk and brush it lightly over the tops of the pastries, taking care not to let it drip onto the cut edges. Egg on the edges glues the layers together and keeps the pastry from rising well. The tops are right when they are evenly shiny with no pooled drops.
Step 13
Bake at 190°C for about 16 to 20 minutes, rotating the tray after ten minutes. This temperature is enough to open up the layers and caramelize the outer crust. The pastries are done when they are a deep golden brown, feel light when you pick them up and crackle when you gently squeeze an edge.
Step 14
Move the pastries to a rack to cool for about fifteen minutes before eating. Letting the steam escape keeps the crust crisp and the chocolate from being too hot. They are ready when the crust is dry and crisp and the chocolate inside is still soft.
Equipment
- Oven
- Stand mixer
- Rolling pin
- Bench scraper
- Kitchen scale
- Plastic wrap
- Parchment paper
- Baking sheet
- Pastry brush
- Wire cooling rack
- Refrigerator
Tips
- If the butter starts to soften or the dough shrinks back as you roll, put it in the fridge for another twenty minutes and then continue rather than forcing it.
- You can freeze the rolled pastries before proofing; when you want them, thaw them overnight in the fridge, then proof and bake as usual.
- Use dark chocolate with about fifty to sixty percent cocoa so it holds its shape in the oven.
Storage
Pain au chocolat is best on the day it is baked, kept at room temperature in a paper bag. You can freeze baked pastries for up to a month and reheat them at 170°C for about five minutes to crisp them up.
Common problems and how to fix them
- Butter leaks out onto the tray during baking.
- The pastries were proofed somewhere too warm or were not proofed long enough. Proof them below 27°C and wait until they clearly jiggle before baking.
- The inside is dense, with no clear layers.
- The butter broke up or melted into the dough while rolling. Keep the butter and dough at a similar pliability, chill between folds and roll quickly.
This recipe is based on the common ratios for this bake and is written entirely in our own words.