Olive bread
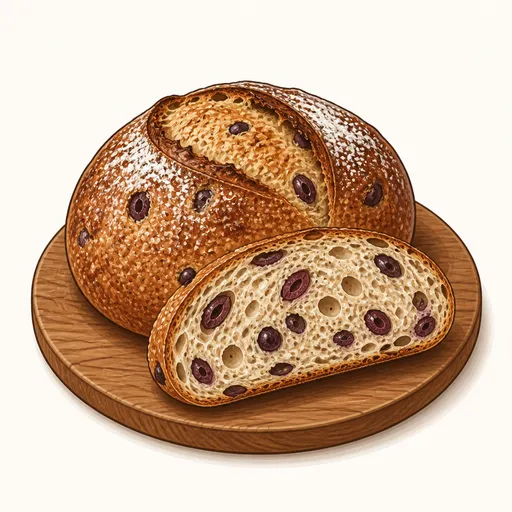
Olive bread is a round Mediterranean-style loaf with a shatteringly crisp crust, a chewy, open crumb full of air pockets and bold, briny pieces of Kalamata olive. A little whole wheat flour gives the crumb a gentle nutty flavor, while olive oil adds fragrance and keeps the bread moist longer. It bakes in a lidded cast-iron pot that traps steam, so the crust bursts open beautifully, just like at a bakery.
- Difficulty
- Medium
- Prep
- 30 min
- Cook
- 40 min
- Rising or chilling
- 3 hr 30 min
- Total time
- 4 hr 40 min
- Method
- Oven-baked
Ingredients
Dough
Olives and herbs
Instructions
Step 1
Mix 450 g bread flour, 50 g whole wheat flour and 350 g warm water in a large bowl until no dry flour remains, then cover and leave it alone for about twenty minutes. This rest lets the flour absorb the water and the gluten start forming on its own, so you knead less and the dough is still strong. The dough is right when it is noticeably softer and more supple and stretches when gently pulled.
Step 2
Sprinkle 5 g instant yeast and 9 g salt over the dough, pour in 20 g olive oil and knead by hand or machine for about eight minutes. The salt goes in later so it doesn't interfere with the flour's initial absorption of water. The dough is right when it is smooth and elastic and stretches into an almost transparent membrane.
Step 3
Drain 150 g pitted Kalamata olives, pat them dry and cut them in half, along with 4 g finely chopped mixed fresh herbs, such as rosemary, if using; stretch the dough into a rectangle, scatter the olives over it and fold the dough up like an envelope. Folding instead of kneading keeps the olives from breaking up and staining the dough purple. You are done when the olives are tucked inside and fairly evenly distributed.
Step 4
Place the dough in an oiled bowl, cover with plastic wrap and let it rise somewhere warm for about an hour and a half, stretching and folding the dough every half hour during the first part. The long rise lets the yeast develop flavor and builds the open crumb structure. The dough is right when it has nearly doubled, the top is rounded and puffy and large bubbles show against the sides of the bowl.
Step 5
Turn the dough out onto the counter, fold the edges into the middle, then flip it over and use both hands to rotate and drag the dough toward you to form a tight, round ball. A taut surface helps the loaf rise tall instead of spreading out sideways. The ball is right when it is evenly round, the top is smooth and taut and the seam sits neatly underneath.
Step 6
Set the dough on a sheet of parchment paper, cover with a towel and let it proof for about forty-five minutes more. The final proof lets the dough regain the gas it lost during shaping. The dough is right when a fingertip dent fills back in slowly but doesn't disappear completely.
Step 7
While the dough has its final proof, put a lidded cast-iron pot in the oven and preheat at 240 degrees C for about thirty minutes. The blazing hot pot gives the dough a burst of heat and traps its steam, so the bread springs up and the crust turns glossy and crisp. The pot is ready when the oven has held its temperature long enough and the lid is evenly hot too.
Step 8
Score a cut about one centimeter deep across the top of the dough, lift it by the parchment into the pot, cover with the lid and bake at 240 degrees C for 20 minutes. Steam trapped in the pot keeps the crust soft so the bread can rise as much as possible. Move on when you lift the lid and see the bread has risen tall, the score has burst open wide and the crust is still pale.
Step 9
Remove the lid, lower the heat to 220 degrees C and bake for 18 to 22 minutes more, until the crust is dark and crisp. Baking uncovered lets moisture escape and the crust caramelize. The bread is done when the crust is deep brown, the bottom sounds hollow when tapped and a thermometer inserted in the center of the crumb reads about 96 degrees C.
Step 10
Move the bread to a wire rack and let it cool for at least one hour before slicing. The crumb keeps setting as it cools, and cutting too early leaves it gummy and damp. The bread is ready when the bottom is completely cool and the crust crackles softly when squeezed gently.
Equipment
- Oven
- Deep skillet
- Mixing bowl
- Bench scraper
- Kitchen scale
- Plastic wrap
- Parchment paper
- Wire cooling rack
Tips
- Brined olives are quite salty, so if yours are very salty, you can cut back a little on the salt in the dough.
- You can mix black and green olives, or add grated lemon zest for a fresher flavor.
- If you don't have a cast-iron pot, bake the loaf on a hot baking sheet with a pan of boiling water on the rack below to create steam.
Storage
The crust stays crisp in a paper bag at room temperature for about two days; avoid plastic bags, which will soften the crust. You can slice and freeze the bread for up to a month, then toast the slices straight from frozen.
Common problems and how to fix them
- The crumb has purple streaks and is damp around the olives.
- The olives weren't patted dry, or they were kneaded into the dough and crushed. Pat the olives very dry with paper towels and only fold them gently into the dough.
- The loaf spread out and didn't rise tall.
- The dough was overproofed or not shaped tightly enough. Check the dough with your finger sooner, and shape it with a tighter surface.
This recipe is based on the common ratios for this bake and is written entirely in our own words.