Mille crepe cake
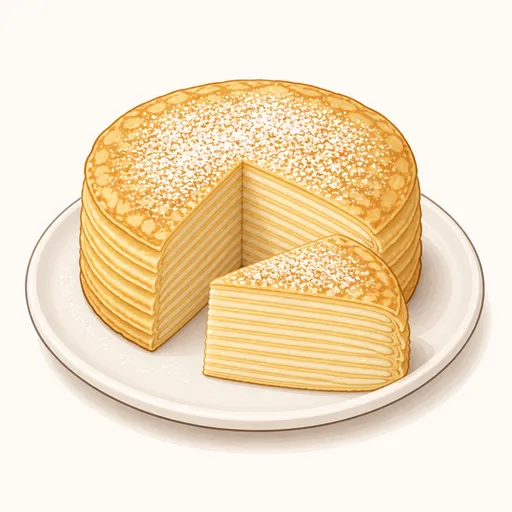
A mille crepe cake is made from about twenty thin crepes stacked high, layered with vanilla pastry cream lightened with whipped cream. It needs no oven, and each slice reveals perfectly even layers that are soft, silky and melt gently in your mouth like a light, refreshing cream cake.
- Difficulty
- Hard
- Prep
- 1 hr
- Cook
- 1 hr 10 min
- Rising or chilling
- 5 hr
- Total time
- 7 hr 10 min
- Method
- Pan-cooked or waffle iron
Ingredients
Crepe batter
Oil for the pan
Vanilla pastry cream
Whipped cream
Decoration
Instructions
Step 1
Put 250 g eggs, 620 g whole milk, 50 g granulated sugar, a pinch of salt and 50 g melted butter in a bowl and whisk well, then sift in 300 g all-purpose flour and whisk until smooth; finally, strain the batter through a sieve. Straining removes any lumps so the crepes come out perfectly thin and flat. The batter is ready when it's thin and smooth, like diluted condensed milk, and pours in an unbroken stream.
Step 2
Cover the bowl tightly and refrigerate for at least 60 minutes. Resting relaxes the gluten, so the crepes are supple and less likely to tear when spread thin. The batter is ready when the surface has no more bubbles and it's slightly thicker than when first mixed.
Step 3
Heat 750 g whole milk. Whisk 125 g egg yolks with 150 g granulated sugar and 60 g cornstarch until pale and fluffy, then slowly pour in the milk, return everything to the pan and stir constantly over medium heat until it boils and thickens. Take the pan off the heat and stir in 40 g unsalted butter and 6 g vanilla extract. The cream is ready when it's thick and glossy and falls from the whisk in heavy dollops.
Step 4
Spread the pastry cream on a tray, press plastic wrap directly onto the surface and chill for about two hours. The cream has to be completely cold before you mix it with the whipped cream, or the whipped cream will melt. It's ready when it's evenly cold and has set firm.
Step 5
Heat a 20 cm nonstick pan over medium heat, wipe it with a thin film of vegetable oil (to taste), pour in a small ladle of batter and swirl the pan to spread it thin, cook on one side only, then remove; repeat until the batter is used up, making about twenty crepes. Crepes cooked on just one side are softer and stack more evenly. Each crepe is ready when the top is dry, the edges lift slightly and the underside is an even pale golden.
Step 6
Lay the crepes out flat on trays or parchment paper, without stacking them while hot, and let them cool for about 30 minutes. Hot crepes stacked on top of each other stick together and sweat, which makes the cream layers soggy. They're ready when they're completely cool, soft to the touch and dry on the surface.
Step 7
Whip 300 g very cold whipping cream with 25 g powdered sugar on medium speed for about four minutes. The whipped cream makes the filling lighter and airier than pastry cream alone. The cream is ready when it reaches medium-stiff peaks that stand up but the surface is still smooth, not lumpy.
Step 8
Whisk the cold pastry cream for a few seconds to loosen it, then fold in the whipped cream in two additions with a spatula. Fold gently to keep the whipped cream light. The filling is ready when it's an even creamy yellow, smooth and thick enough to spread without running.
Step 9
Place one crepe on a plate, spread a thin layer of cream about 3 mm thick almost to the edge, lay the next crepe on top and repeat until all the crepes are used, saving the prettiest one for the top. Thin, even layers of cream give a cleanly layered slice. The cake is ready when it stands straight, the layers are neat and the sides don't bulge unevenly.
Step 10
Wrap the cake loosely in plastic wrap and refrigerate for at least four hours. Chilling sets the cream and bonds the layers into one firm cake. It's ready when it feels firm when pressed lightly and the cream no longer slides between the layers.
Step 11
Sift powdered sugar (to taste) over the top of the cake, dip a knife in hot water, wipe it dry and cut the cake into slices, wiping the knife after each cut. A warm knife slices cleanly through the layers without dragging them out of place. The cake is finished when the cut sides are smooth and clearly show alternating layers of crepe and cream.
Equipment
- Nonstick skillet
- Whisk
- Hand mixer
- Small saucepan
- Spatula
- Sieve
- Mixing bowl
- Kitchen scale
- Plastic wrap
- Refrigerator
Tips
- Lay a 20 cm plate over each crepe and trim around it so they're all the same size before stacking.
- You can torch a layer of sugar on top of the cake with a kitchen blowtorch for a crisp caramel crust like crème brûlée.
- Add a little matcha powder or cocoa powder to the crepe batter to change up the color and flavor.
Storage
Stored in an airtight container in the fridge, the cake is best within three days. Unassembled crepes can be stacked between sheets of parchment and frozen for a month; thaw them in the fridge before using.
Common problems and how to fix them
- The layers slide and the cake leans to one side.
- The cream was too soft or the cake wasn't chilled long enough. Make sure the pastry cream is completely cold before mixing, and let the cake chill overnight.
- The crepes are thick and uneven.
- The batter was too thick or the pan wasn't hot enough. Add a little milk to the batter and swirl the pan very quickly as soon as you pour the batter in.
This recipe is based on the common ratios for this bake and is written entirely in our own words.