Lemon tart
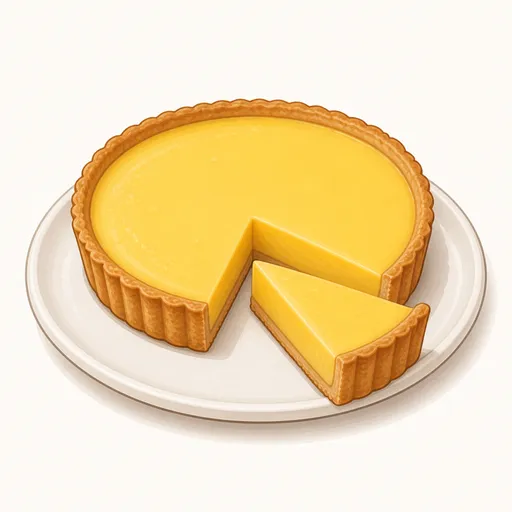
This French-style lemon tart has a thin, crisp buttery almond crust and a silky baked lemon filling that's bright, tangy and fragrant with lemon zest. Its fresh tartness is balanced by the richness of cream and butter, making it a light dessert to end a meal.
- Difficulty
- Medium
- Prep
- 40 min
- Cook
- 55 min
- Rising or chilling
- 3 hr 20 min
- Total time
- 4 hr 55 min
- Method
- Oven-baked
Ingredients
Crust
Lemon filling
Instructions
Step 1
Mix 200 g all-purpose flour, 25 g almond flour, 70 g powdered sugar and a pinch of salt, then add 110 g cold butter cut into small pieces and rub it in lightly between your fingertips. Coating the butter in flour makes the crust crisp and short instead of tough. The mixture is ready when it's as fine as damp sand with no large pieces of butter left.
Step 2
Beat 40 g egg, drizzle it over the flour mixture and gather it lightly with your hands, then smear the dough across the counter two or three times with the heel of your hand. Smearing blends the butter and flour evenly without long kneading. The dough is ready when it forms a smooth, evenly colored ball with no cracks at the edges.
Step 3
Press the dough into a flat disc, wrap it in plastic wrap and refrigerate for about an hour. Resting relaxes the gluten so the crust doesn't shrink in the oven. The dough is ready when it has firmed up but still bends when you gently flex an edge.
Step 4
Roll the dough between two sheets of parchment paper into a round about three millimeters thick and a few centimeters larger than a 23 cm tart pan, then lay it in the pan, press it into the corners and against the sides, and trim off the excess. The parchment keeps the dough from sticking and makes it easy to move into the pan. The shell is right when it's evenly thick, fits snugly in the pan and has a level trimmed edge.
Step 5
Prick the bottom of the shell a few times with a fork, then put the whole pan in the freezer for about twenty minutes. A frozen-solid shell keeps its sides straight when it meets the oven's heat. This step is done when the shell is completely hard and sounds solid when tapped.
Step 6
Preheat the oven to 180°C with a rack in the middle while the shell is freezing. Baking the shell in an oven that isn't hot enough will melt the butter and make the sides slump. The oven is ready when it has preheated for about fifteen minutes and the heating light has gone off.
Step 7
Line the shell with a sheet of parchment paper, fill it to the top with dried beans or rice and bake at 180°C for about 15 to 18 minutes. The weight keeps the bottom from puffing up and the sides from sliding down. Move on when the edges of the shell are dry and starting to turn pale golden.
Step 8
Lift out the parchment and beans, return the shell to the oven for about 8 to 10 more minutes at the same temperature, then lower the oven to 150°C. Baking it uncovered dries the bottom so it stays crisp and doesn't get soggy from the filling. The shell is ready when the bottom is evenly golden and feels dry to the touch.
Step 9
In a bowl, gently whisk 200 g eggs with 150 g sugar and 8 g grated lemon zest, then add 125 g lemon juice and 125 g heavy cream and stir just until combined. Whisking gently avoids air bubbles that would leave the surface pitted. The mixture is ready when it's smooth, pale yellow and almost free of foam.
Step 10
Strain the filling through a fine sieve into a pouring jug to remove the zest and any strands of egg, then let it sit for a few minutes so the foam rises, and skim it off. A strained filling bakes up with a glossy, mirror-smooth surface. The filling is ready when it's clear, pours evenly and has no foam on top.
Step 11
Set the tart shell on a baking sheet in the oven, pour in the filling right up to the rim and bake at 150°C for about 25 to 30 minutes. Low heat lets the filling set silky smooth without cracking or bubbling. The tart is done when the edges of the filling have set and the center only wobbles slightly like jelly when you shake the sheet.
Step 12
Let the tart cool in its pan on a rack for about an hour, then refrigerate it for at least two hours before slicing. The lemon filling must be thoroughly cold to set firmly and slice cleanly. It's ready when the surface of the filling is glossy and firm and a knife leaves clean, sharp slices.
Equipment
- Oven
- Tart pan
- Rolling pin
- Mixing bowl
- Whisk
- Sieve
- Parchment paper
- Kitchen scale
- Plastic wrap
- Refrigerator
Tips
- Zest the lemons before juicing them, and grate only the yellow peel to avoid the bitterness of the white pith.
- Pouring the filling in once the shell is already in the oven keeps you from spilling it while moving the pan.
- Before serving, you can dust a little powdered sugar around the edge of the tart or decorate it with a few thin slices of lemon.
Storage
Store the lemon tart in the fridge, loosely covered so condensation doesn't form on the filling; it's best within three days. The crust softens over time, so cut portions as you serve them.
Common problems and how to fix them
- The surface of the filling cracks after baking.
- The filling was baked too long or the oven was too hot. Take the tart out while the center still wobbles slightly, and check your oven with a thermometer.
- The sides of the shell slump during baking.
- The shell wasn't cold enough or wasn't weighted down. Freeze the shell thoroughly and fill it with dried beans right up to the rim before baking.
This recipe is based on the common ratios for this bake and is written entirely in our own words.