Soft dinner rolls
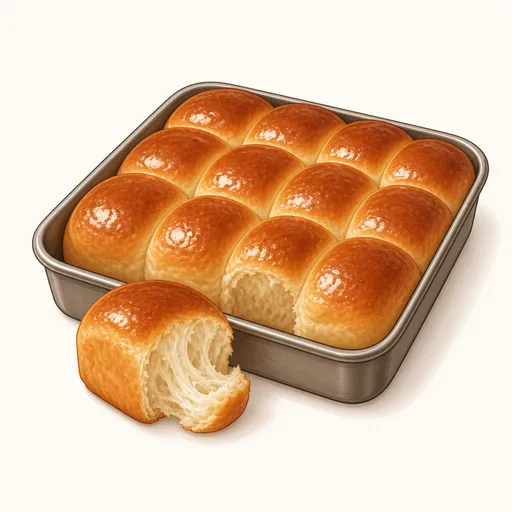
Soft dinner rolls are little buns baked snugly side by side in one pan, so once they come out of the oven you can pull them apart one by one to reveal a white, fluffy crumb that smells of milk and butter. The thin crust has a gentle shine from an egg wash and a brush of butter, and they're perfect alongside soup or a stew, or split open with a little jam for breakfast.
- Difficulty
- Easy
- Prep
- 30 min
- Cook
- 20 min
- Rising or chilling
- 1 hr 40 min
- Total time
- 2 hr 30 min
- Method
- Oven-baked
Ingredients
For the dough
For brushing the tops
Instructions
Step 1
Put 500 g bread flour, 50 g granulated sugar and 7 g instant yeast in the bowl of a stand mixer, give it a quick stir, then add 9 g salt on the side opposite the yeast. Pour in 300 g whole milk warmed to about 35°C along with 50 g eggs and mix on low speed. Keeping the salt from touching the yeast directly helps the yeast stay lively, and you can stop once there's no dry flour left at the bottom of the bowl.
Step 2
Raise the speed to medium and knead for about six minutes, then add 60 g softened unsalted butter in small pieces and keep kneading until the butter is fully worked into the dough. Adding the butter later lets the gluten network form first, so the rolls still rise tall. The dough is ready when it's smooth and glossy, pulls away from the sides of the bowl and stretches into a thin, almost translucent windowpane.
Step 3
Shape the dough into a round ball, set it in a lightly oiled bowl, cover with plastic wrap and leave it somewhere warm for about an hour. This rest gives the yeast time to make gas and develop flavor in the crumb. The dough is done proofing when it has doubled in size and a fingertip pressed into it leaves a dent that springs back very slowly.
Step 4
Press the dough down to release some of the gas, divide it into twelve equal pieces using a scale, then roll each piece into a tight ball by tucking the edges underneath and spinning it on the counter. A taut surface helps each roll rise round and even with a smooth crust. Arrange the balls in a greased 23 x 33 cm rectangular pan, leaving about a finger's width between them.
Step 5
Cover the pan with plastic wrap and let the rolls proof for about 40 minutes more somewhere warm and draft-free. The second proof makes the rolls even fluffier and lets them grow until they touch. They're ready when they've puffed up, are pressed against one another and the dough jiggles slightly when you gently shake the pan.
Step 6
While the rolls are on their second proof, heat the oven to 190°C with a rack in the middle. The oven needs to be evenly hot before the rolls go in so they spring up right away in the first few minutes. It's ready when the heating light turns off and you can feel heat radiating evenly as you open the door.
Step 7
Beat 25 g eggs with a spoonful of water and use a pastry brush to paint it very lightly over the top of each roll. A thin layer of egg gives the crust a lovely golden brown color and shine. You've brushed enough when the tops look evenly glossy but no egg is pooling in the gaps between the rolls.
Step 8
Bake the rolls at 190°C for about 18 to 22 minutes, turning the pan after ten minutes if your oven heats unevenly. A moderate temperature cooks the crumb through without letting the crust turn hard and dry. They're done when the tops are a deep golden brown and a roll sounds hollow when you tap the bottom.
Step 9
As soon as the pan comes out, brush 15 g melted unsalted butter over the hot tops, then move the rolls to a rack to cool for about ten minutes. The butter soaks into the crust, making it softer and more fragrant. The rolls are finished when the tops are glossy and smooth and a torn roll shows a fluffy white crumb that pulls apart in strands.
Equipment
- Oven
- Stand mixer
- Kitchen scale
- Mixing bowl
- Rectangular pan
- Plastic wrap
- Pastry brush
- Wire cooling rack
Tips
- If you want perfectly even rolls, weigh the whole batch of dough after proofing and divide by twelve to find the weight of each piece.
- In cold weather, you can proof the dough in a switched-off oven with a bowl of hot water on the rack below to create a warm, humid spot.
- For a crumb that stays soft longer, swap part of the milk for plain unsweetened yogurt, keeping the total amount of liquid the same.
Storage
Once cooled and sealed in a bag, the rolls stay soft at room temperature for about two days. You can freeze them for up to a month; to serve, just thaw them and warm them in a 160°C oven for about five minutes to soften them again.
Common problems and how to fix them
- The rolls didn't rise much and the crumb is dense.
- The yeast may have been weak, or the milk was too hot and killed it. Use yeast that's within its date, keep the milk just warm to the touch and proof until the dough has truly doubled.
- The crust is hard and dry.
- The rolls baked too long or the oven ran too hot. Cut the baking time by a few minutes, check the temperature with an oven thermometer and don't forget to brush on the butter as soon as they come out.
This recipe is based on the common ratios for this bake and is written entirely in our own words.