Danish pastries
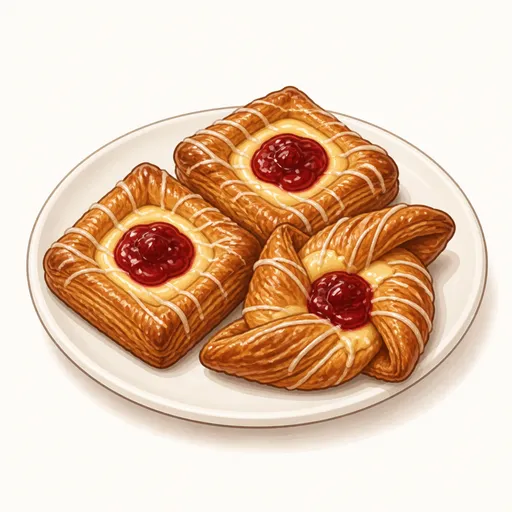
Danish pastries are a laminated yeasted dough, enriched with milk, eggs and a touch of cardamom in the Nordic style, then rolled and folded with butter. As they bake, the pastry separates into countless thin, crisp layers that cradle a custard and fruit jam filling, finished with a drizzle of glossy icing.
- Difficulty
- Very hard
- Prep
- 1 hr 30 min
- Cook
- 18 min
- Rising or chilling
- 5 hr 30 min
- Total time
- 7 hr 18 min
- Method
- Oven-baked
Ingredients
Pastry dough
Butter block
Custard filling
Fruit jam filling
Egg wash and icing
Instructions
Step 1
Put 500 g bread flour, 60 g granulated sugar, 9 g instant yeast, 2 g ground cardamom and 9 g salt in the mixer bowl, add 160 g cold whole milk, 100 g eggs and 60 g water and knead on low speed, then finally add 40 g softened unsalted butter and knead for about five more minutes. Danish dough only needs moderate kneading, because the rolling and folding that follow keep developing the gluten. The dough is ready when it is smooth, soft, slightly tacky and stretches into a thick membrane.
Step 2
Press the dough into a flat rectangle, wrap it tightly and refrigerate for about an hour and a half or overnight. Cold dough slows the yeast and matches the firmness of the butter, so the two layers spread evenly when rolled. The dough is ready when it is firm, cold and has risen slightly.
Step 3
Heat 250 g whole milk until steaming, whisk 54 g egg yolks with 50 g granulated sugar and 20 g cornstarch, slowly pour in the milk, then cook again over medium heat while whisking constantly; turn off the heat and add 4 g vanilla extract. The custard filling must be thicker than usual so it doesn't spread in the oven. The custard is ready when it bubbles thickly and is thick enough to hold a mound on a spoon; then press plastic wrap onto it and chill.
Step 4
Sandwich 300 g cold unsalted butter between two sheets of parchment paper, pound and roll it with a rolling pin into a square about 18 cm across, then refrigerate. Butter that is pounded pliable but still cold rolls out thin with the dough without breaking into pieces. The butter block is ready when it is flat, evenly thick and bends without breaking.
Step 5
Roll the dough into a large square about twice the size of the butter block, set the butter diagonally in the center, then fold the four corners of the dough over to enclose it and pinch the edges firmly. Sealing the butter in keeps it from showing through or leaking out as you roll. The dough is ready when the butter sits snugly inside and the edges of the dough are sealed together.
Step 6
Dust the counter lightly with flour, roll the dough in one direction into a strip about 50 cm long, then fold it in thirds like a letter, brushing off excess flour from the surface before each fold. Each letter fold triples the number of butter layers, laying the foundation for the flaky texture. The fold is right when the edges line up and no butter breaks through the surface.
Step 7
Wrap the dough and refrigerate for about thirty minutes. The butter needs to firm up and the gluten needs to relax; if you keep rolling right away, the butter will melt and the dough will shrink back. The dough is ready when it is evenly cold and feels as firm as cold butter when pressed.
Step 8
Turn the dough ninety degrees so the folded edge faces you, roll it again into a long strip and fold it in thirds once more. Changing direction before each roll helps the layers develop evenly in both length and width. The dough is ready when the surface is smooth, the corners are square and the cut side shows fine streaks of butter.
Step 9
Wrap the dough tightly and refrigerate for another hour before shaping. This long rest lets the dough relax fully so the pieces don't shrink or warp when cut. The dough is ready when a test-rolled corner keeps its size.
Step 10
Roll the dough into a rectangle about five millimeters thick and cut it with a very sharp knife into sixteen squares about 10 cm on each side. A sharp knife cutting straight down keeps the edges from sealing the layers together so they rise tall and even. The squares are ready when the corners are neat and the cut sides clearly show the layers.
Step 11
Shape them as you like, for example folding four corners into the center for a pinwheel, or cutting two diagonal slits at the corners to make a frame, then place a spoonful of custard and a little 120 g fruit jam in the center and arrange them on a lined tray. Filling placed in the center gets wrapped by the rising layers of pastry. Each pastry is ready when the filling sits neatly in the middle and the folded corners are pressed firmly.
Step 12
Cover loosely with plastic wrap and proof the pastries in a warm spot at about 26 degrees Celsius for an hour and a half, never anywhere warmer. Too much heat will make the butter leak out of the layers and the pastries lose their flakiness. They are proofed when visibly puffed, jiggle slightly when you shake the tray and a gentle press leaves a dent that slowly fills back in.
Step 13
While the pastries proof, preheat the oven to 200 degrees Celsius and set a rack in the middle. The oven must be very hot so the water in the butter turns to steam right away and pushes the layers apart. The oven is ready when the heat indicator light has gone off.
Step 14
Lightly brush 50 g beaten eggs over the pastry, avoiding the cut edges, then bake at 200 degrees Celsius for 15 to 18 minutes. Egg on the edges glues the layers together and keeps the pastries from rising well. They are done when deep golden brown, light when lifted and evenly browned underneath.
Step 15
Stir 80 g powdered sugar with 15 g water into a thick icing, wait for the pastries to cool a little, then drizzle it over the tops in thin lines. Drizzling while the pastries are still slightly warm helps the icing cling and dry into a translucent white layer. The pastries are finished when the icing has set on the surface and is no longer sticky.
Equipment
- Oven
- Stand mixer
- Rolling pin
- Bench scraper
- Small saucepan
- Whisk
- Kitchen scale
- Baking sheet
- Parchment paper
- Plastic wrap
- Pastry brush
- Refrigerator
Tips
- Butter with a high fat content of 82 percent or more stays more pliable when cold and helps the layers separate more clearly.
- If your kitchen is very warm, put the dough in the fridge for an extra fifteen minutes whenever the butter starts to soften or the dough sticks to the counter.
- You can replace the jam with sautéed apples, fresh blueberries or cream cheese beaten with sugar for a variety of flavors.
Storage
Danish pastries are best on the day they're baked. You can keep them in an airtight container at room temperature for a day, or freeze baked, un-iced pastries for up to a month and reheat them in the oven at 170 degrees Celsius for about eight minutes.
Common problems and how to fix them
- Butter leaked out into puddles on the tray during baking.
- The pastries were proofed somewhere too warm or for too long. Proof them below 27 degrees Celsius and bake them as soon as they have risen just enough.
- The pastries have no distinct layers and a dense, bread-like crumb.
- The butter broke into pieces because it was too cold, or melted into the dough because it was too soft. Keep the butter and dough at the same firmness and chill them long enough between folds.
This recipe is based on the common ratios for this bake and is written entirely in our own words.