Cranberry walnut bread
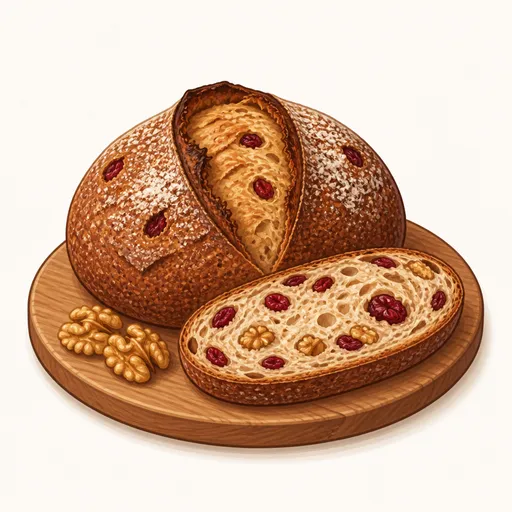
This crusty artisan-style loaf has a lightly chewy crumb studded with sweet-tart dried cranberries and nutty toasted walnuts. The dough uses little yeast and is folded several times, giving it a deep wheat flavor, and it's wonderful for breakfast with cream cheese or butter.
- Difficulty
- Medium
- Prep
- 30 min
- Cook
- 45 min
- Rising or chilling
- 3 hr
- Total time
- 4 hr 15 min
- Method
- Oven-baked
Ingredients
Bread dough
Nuts and dried fruit
Instructions
Step 1
Spread 100 g walnuts on a tray and toast them in the oven at 170 degrees Celsius for about 8 to 10 minutes, then let them cool and break them into medium pieces. Toasting first makes the nuts crunchier and tames the bitterness of their papery skins. The walnuts are ready when they smell fragrant and the insides have turned pale golden.
Step 2
Dissolve 20 g honey in 360 g warm water, pour it into a bowl containing 450 g bread flour, 50 g whole wheat flour, 4 g instant yeast and 10 g salt, then mix by hand or with a stiff spatula until no dry flour remains. A wet dough gives the bread large air holes and a thin, crisp crust. The mixture is ready when it forms a sticky, shaggy mass with no white streaks of flour.
Step 3
Cover the bowl and let the dough rest for ten minutes, then wet your hand, pull one edge of the dough up high and fold it into the center, turn the bowl and repeat four times; do three rounds like this, ten minutes apart. This folding replaces long kneading while still strengthening the gluten. After the last round, the dough has a taut surface and holds a round shape.
Step 4
Spread the dough out thinly on a lightly wet counter, scatter 100 g dried cranberries and the toasted walnuts evenly over it, roll the dough up and fold it a few more times. Adding the mix-ins once the gluten is strong keeps them from tearing the dough's structure. You'll see the fruit and nuts spread evenly throughout the dough with few poking out.
Step 5
Return the dough to the bowl, cover it tightly and let it rise at room temperature for about an hour and a half. A slow rise lets the yeast develop the gentle tang typical of artisan bread. The dough is ready when it has grown about one and a half times, has bubbles on the surface and jiggles when you shake the bowl.
Step 6
Turn the dough out onto a lightly floured counter, fold the edges into the center, flip it over, then use both palms to drag and rotate the dough on the counter to build tension. A taut surface helps the loaf rise tall instead of spreading out. The loaf is ready when it is round, with a smooth, tight top and a sealed bottom.
Step 7
Place the loaf on a sheet of parchment paper, cover it with a towel and let it rise for about forty-five minutes; meanwhile, put a 24 cm cast-iron pot with a lid in the oven and preheat it to 240 degrees Celsius. A preheated pot traps steam, helping the bread spring up dramatically in the oven. The dough is ready when a gentle poke leaves a dent that fills back in slowly rather than springing back right away.
Step 8
Score a slash about one centimeter deep across the top of the dough, lift the whole parchment sheet into the pot, cover it and bake at 240 degrees Celsius for 20 minutes. The steam trapped in the pot keeps the crust soft longer so the bread has time to rise. When you lift the lid, the loaf has risen tall and the slash has opened wide, but the crust is still pale.
Step 9
Remove the lid, lower the oven to 220 degrees Celsius and bake for another 20 to 25 minutes. Baking uncovered dries the crust and turns it a caramel color. The bread is done when the crust is deep brown, the bottom sounds hollow when tapped and the internal temperature is about 96 degrees Celsius.
Step 10
Move the bread to a rack and let it cool for at least an hour before slicing. The crumb is still cooking from the heat inside, and cutting it too soon leaves it gummy. The bread is ready when the bottom is completely cool and the crust crackles softly.
Equipment
- Oven
- Deep skillet
- Mixing bowl
- Bench scraper
- Kitchen scale
- Parchment paper
- Wire cooling rack
- Plastic wrap
Tips
- If the cranberries are very dry, soak them in warm water for ten minutes and pat them dry so they don't draw water from the dough.
- Without a cast-iron pot, you can bake the loaf on a tray and place a tray of boiling water on the rack below to create steam.
- For a deeper flavor, you can let the dough rise overnight in the fridge after adding the mix-ins; the next day, just bring it back to room temperature and shape it.
Storage
The bread keeps for two to three days at room temperature in a paper bag or cut side down on a cutting board. You can also slice it and freeze it for up to a month, toasting the slices one at a time when needed.
Common problems and how to fix them
- The loaf spread out and baked flat.
- The dough wasn't shaped with enough surface tension, or it overproofed. Drag and rotate the dough more thoroughly when shaping, and do the finger test earlier during the final rise.
- The crust is thick, hard and pale.
- The oven wasn't hot enough or there wasn't enough steam early on. Preheat the pot for at least thirty minutes and always keep the lid on for the first twenty minutes.
This recipe is based on the common ratios for this bake and is written entirely in our own words.