Coconut tart
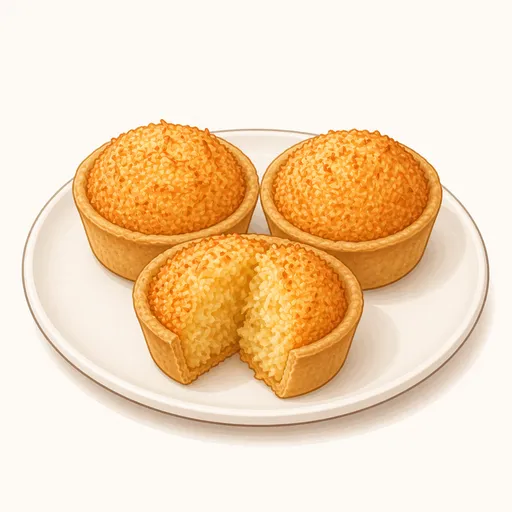
Coconut tarts are a familiar sight in Hong Kong bakeries and dim sum teahouses, often displayed right next to egg tarts. A crisp, buttery crust holds a filling of desiccated coconut mixed with egg and milk, which puffs up in the oven into a golden top that smells wonderfully of toasted coconut.
- Difficulty
- Easy
- Prep
- 35 min
- Cook
- 25 min
- Rising or chilling
- 45 min
- Total time
- 1 hr 45 min
- Method
- Oven-baked
Ingredients
Butter pastry crust
Coconut filling
Instructions
Step 1
Beat 120 g softened unsalted butter with 50 g powdered sugar and a pinch salt on low speed, beat in 30 g eggs, then tip in 200 g all-purpose flour and mix gently until no dry flour remains. This creamed pastry gives the tart shells a crisp, crumbly texture like butter cookies. The dough is ready when it is soft and smooth, slightly pliable and comes together into a ball.
Step 2
Wrap the dough in plastic wrap and refrigerate for about thirty minutes. Chilled dough is less soft, so it is easy to portion and press into the pan without sticking to your fingers. The dough is ready when it has firmed up but still gives when pressed with a finger.
Step 3
Divide the dough into twelve equal balls, place each in a cup of a muffin pan, then use your thumb to press the dough up the sides into a thin, even cup. Pressing by hand lets the shell hug the pan without any rolling. The shells are ready when they are about three millimeters thick with level edges flush with the top of each cup.
Step 4
Mix 120 g desiccated coconut with 100 g granulated sugar, 50 g melted unsalted butter and 60 g evaporated milk, let it sit for about fifteen minutes, then stir in 100 g eggs and 2 g baking powder. The soaking time lets the dry coconut absorb the milk so the filling is soft and moist instead of dry and stringy. The filling is ready when the coconut is soft and the mixture is thick, with a little liquid at the bottom of the bowl.
Step 5
Spoon the coconut filling into each shell until almost level with the rim, pressing lightly to spread it evenly. The filling puffs up during baking, so there is no need to heap it high. Each shell is ready when the filling is level and none has spilled onto the edge of the crust.
Step 6
Bake at 190 degrees Celsius for about 20 to 25 minutes, rotating the pan once halfway through so the tarts brown evenly. The fairly high heat crisps the crust quickly and toasts the coconut top into a fragrant golden layer. The tarts are done when the filling has puffed and turned golden brown and the crust is the color of a baked cookie.
Step 7
Leave the tarts in the pan for about fifteen minutes, then gently run the tip of a knife around the edges and lift each one onto a rack to cool completely. The butter crust is very soft while hot, and waiting a while keeps the tarts from breaking as you remove them. The tarts are finished when the crust is firm and crisp and the coconut filling has settled slightly and firmed on top.
Equipment
- Oven
- Muffin tin
- Mixing bowl
- Whisk
- Spatula
- Kitchen scale
- Plastic wrap
- Wire cooling rack
Tips
- You can use whole milk instead of evaporated milk for a slightly lighter filling.
- If the coconut tops brown too quickly, lay a sheet of foil over them for the last few minutes.
- Eat the tarts while still slightly warm to best enjoy the aroma of toasted coconut and the crispness of the crust.
Storage
The tarts keep in an airtight container at room temperature for three days. When the crust softens a little, reheat the tarts in the oven at 160 degrees Celsius for about five minutes to crisp them up again.
Common problems and how to fix them
- The coconut filling is dry and crumbly after baking.
- The desiccated coconut did not soak long enough or the tarts were overbaked. Let the coconut soak in the milk for at least fifteen minutes and take the tarts out as soon as the tops are golden brown.
- The bottom of the crust puffs up.
- Air was trapped under the dough when you pressed it into the pan. Press the dough firmly against the bottom of each cup, and you can prick a few small holes with a fork before adding the filling.
This recipe is based on the common ratios for this bake and is written entirely in our own words.