Beef pie
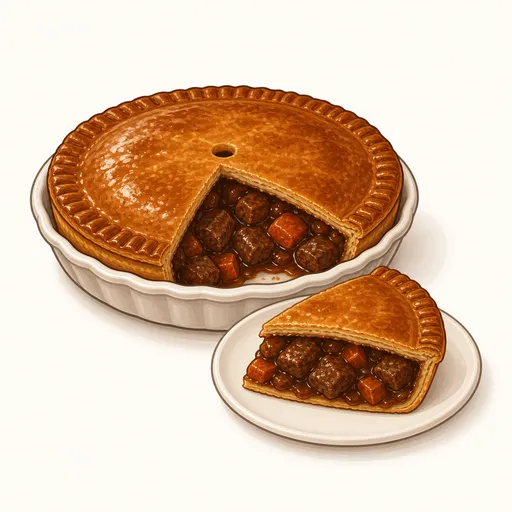
Beef pie is a pub favorite in Britain and Australia, with fall-apart braised beef in a rich brown gravy wrapped in a golden, crisp butter crust. The meat is slow-braised for two hours so it is full of flavor and melts in your mouth, while the crust soaks up a little gravy on the inside and stays crisp on the outside.
- Difficulty
- Medium
- Prep
- 50 min
- Cook
- 2 hr 50 min
- Rising or chilling
- 2 hr 15 min
- Total time
- 5 hr 55 min
- Method
- Oven-baked
Ingredients
Pastry
Braised beef filling
Egg wash
Instructions
Step 1
Mix 350 g all-purpose flour with 4 g salt, add 200 g cold unsalted butter cut into small pieces and rub it in quickly with your fingertips, then add 18 g egg yolks beaten with 100 g cold water and gather into a ball. The yolk makes the pastry sturdier, strong enough to hold a heavy filling with plenty of gravy. The dough is ready when it is smooth, not sticky, with a few small streaks of butter still visible.
Step 2
Divide the dough into two portions, about sixty percent for the base and forty percent for the lid, flatten them, wrap tightly and refrigerate for an hour. Chilled, rested dough shrinks less and rolls out thin without tearing. The dough is ready when it has firmed up and feels cold to the touch.
Step 3
Cut 800 g beef chuck into pieces about three centimeters across, toss them in 30 g all-purpose flour mixed with 6 g salt and a pinch ground black pepper, then brown them in 30 g vegetable oil in a heavy pot over high heat, a few at a time. Browning in small batches sears the meat instead of letting it release liquid, and the flour coating will later thicken the braising liquid. The beef is ready when all sides are deep brown and a fragrant brown crust has formed on the bottom of the pot.
Step 4
Lower the heat to medium, add 200 g diced onions, 100 g carrots and 10 g minced garlic and cook for about five minutes, scraping up the browned bits from the bottom of the pot. Those browned bits hold much of the meat's savory sweetness and will color the gravy. The vegetables are ready when the onions are soft and pale golden and the bottom of the pot is clean.
Step 5
Return the beef to the pot, pour in 450 g beef stock and 15 g soy sauce, add 3 g mixed fresh herbs such as thyme, bring to a boil, then lower the heat, cover with the lid ajar and braise for about two hours, stirring occasionally. Slow braising breaks down the connective tissue in the chuck into gelatin, making the meat tender and the gravy glossy. The filling is ready when the beef falls apart under gentle pressure from a spoon and the gravy is as thick as light cream.
Step 6
Spoon the filling into a wide bowl, let it cool, then refrigerate it for about an hour. Cold filling thickens up, does not melt the butter in the pastry and helps the bottom crust stay crisp. The filling is ready when the gravy has set thick and no warmth remains.
Step 7
Heat the oven to 200°C with a rack in the lower middle, and put a metal baking sheet in to heat up. Setting the pie dish on a hot baking sheet sends heat straight into the bottom from the start. The oven is up to temperature when the indicator light goes off for the first time.
Step 8
Roll the larger piece of dough about three millimeters thick, line a 23 cm pie dish with it, pressing gently into the corners, and leave about one centimeter of overhang beyond the rim. A base of even thickness cooks evenly, with no raw or burnt spots. The base is ready when it fits snugly against the dish with no air pockets or tears.
Step 9
Pour the cold filling into the crust and level it, brush a little water around the edge, lay the remaining dough, rolled thin, over the top, press the two layers together firmly and trim the edge. The water on the edge works like glue to seal the lid to the base. The pie is ready when the edge is completely sealed and the lid lies flat without being stretched.
Step 10
Beat 25 g eggs, brush them evenly over the top of the pie and cut a small hole in the center of the lid. The egg wash gives an appealing golden shine, and the hole lets steam escape from the filling. The top is ready when it has a thin coat of egg with no puddles at the edge.
Step 11
Set the dish on the hot baking sheet and bake at 200°C for 40 to 45 minutes until the crust is golden brown, covering the edge with foil if it darkens too quickly. This is long enough for the crust to bake crisp and the filling to heat through completely. The pie is done when the lid sounds crisp when tapped and gravy bubbles at the steam hole.
Step 12
Let the pie rest on a rack for about fifteen minutes before cutting. A short rest lets the gravy settle so the crust does not crumble when sliced. It is ready when a cut slice keeps its crust intact and the filling does not spill out.
Equipment
- Oven
- Pie dish
- Rolling pin
- Deep skillet
- Mixing bowl
- Kitchen scale
- Pastry brush
- Plastic wrap
- Refrigerator
Tips
- If you have Worcestershire sauce, you can use it in place of half the soy sauce for a more traditionally British flavor.
- Braised beef filling tastes even better the next day, so you can cook it a day ahead and simply assemble and bake the pie.
- You can use store-bought puff pastry for the lid to give the pie a puffed, crisp, pub-style top.
Storage
Once cooled and wrapped tightly, the pie keeps for three days in the fridge. You can freeze the baked pie for up to a month and reheat it in a 180°C oven for about thirty minutes until the filling is hot throughout.
Common problems and how to fix them
- The beef is still tough after braising.
- The meat was not braised long enough, or the heat was too high and made it seize up. Keep the heat very low, at just a gentle simmer, braise for thirty more minutes and test again.
- The lid sinks after baking.
- There was too little filling or it was too thin, so it shrank as it cooled. Fill the dish full, mounded slightly in the center, and cook the gravy thick enough before assembling the pie.
This recipe is based on the common ratios for this bake and is written entirely in our own words.