Steamed layered taro cake (banh da lon khoai mon)
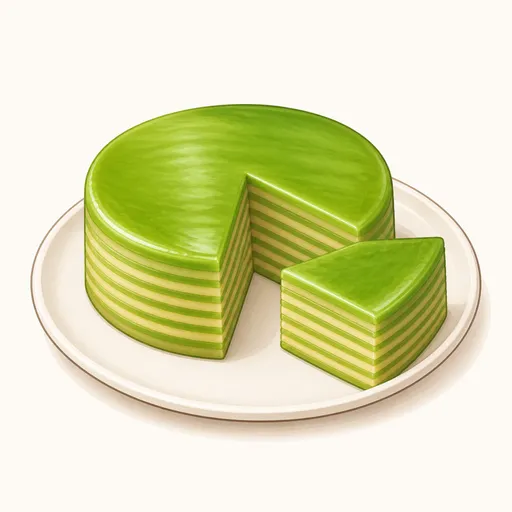
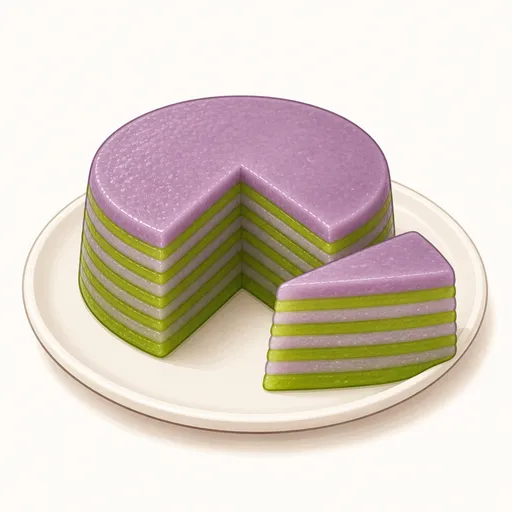
This version of the steamed layered cake uses taro instead of mung beans, so the layers alternate between pale purple and pandan green in a really eye-catching way. The taro layers are rich, nutty and distinctly fragrant, coming together with coconut milk and pandan into soft, chewy tiers that are cool and refreshing after resting for a few hours.
- Difficulty
- Medium
- Prep
- 40 min
- Cook
- 1 hr 30 min
- Rising or chilling
- 5 hr
- Total time
- 7 hr 10 min
- Method
- Steamed
Ingredients
For the coconut milk batter
For the taro layer
For the pandan layer
For preparing the pan
Instructions
Step 1
Peel 250 g taro, rinse it in salted water to remove some of the sliminess, cut it into thick slices and steam over medium heat for about 20 minutes. Steaming keeps the taro from absorbing water, so the purple layers have a deep flavor and the right thickness. The taro is cooked when a chopstick slides through easily and the slices are soft and crumbly.
Step 2
Pour 400 g coconut milk, 230 g water, 260 g granulated sugar and a pinch salt into a saucepan, warm it over low heat and stir until the sugar dissolves, then take it off the heat to cool. Gentle warming dissolves the sugar without making the coconut milk curdle or separate. The coconut mixture is ready when it's smooth with no grains of sugar left.
Step 3
Whisk 300 g tapioca starch with 60 g rice flour, slowly pour in the cooled coconut mixture and stir until dissolved, then strain it through a sieve and let it rest for about half an hour. A rested batter fully absorbs the liquid, so the steamed cake turns out chewy and translucent rather than crumbly. The batter is ready when it's as thin and smooth as milk and no residue is left in the sieve.
Step 4
Ladle about half of the batter into a blender with the still-warm taro, blend until very smooth, then pour it into a separate bowl. Blending the taro with the batter makes it completely smooth and gives the purple layer the same consistency as the green one. The mixture is ready when it's an even pale purple, flows smoothly and has no bits of taro left.
Step 5
Put the remaining batter in another bowl and stir in 90 g pandan juice. When both bowls have about the same consistency, the layers come out equally thick and don't sink into each other. The pandan batter is ready when it's an even fresh green with a gentle fragrance.
Step 6
Bring the steamer to a boil, brush to taste vegetable oil all over the inside of a 20 cm round pan, then set the pan in the steamer to heat for a few minutes before adding any batter. A preheated pan sets the first layer right away and helps the cake release easily. The pan is ready when the oil glistens and the bottom is evenly hot.
Step 7
Stir the batter again before each ladleful, pour in a thin purple layer about half a centimeter deep, cover and steam for about 6 minutes, then add a green layer, alternating until the batter is nearly used up. The layer below must set on top before the next one goes on, so each stands apart with crisp, clear stripes. Each layer is ready when the top turns translucent and no longer sticks to your fingertip when touched lightly.
Step 8
Pour in the final layer and steam for about 20 minutes more over medium heat, remembering to wipe the condensation off the lid partway through. This longer steam cooks the layers underneath all the way through and fuses them into one cake. The cake is done when the top is glossy and translucent and a toothpick inserted in the center comes out clean.
Step 9
Set the pan on a rack and let the cake cool naturally for at least four hours, and don't put it in the fridge while it's still warm. The starch needs time to set so the cake turns chewy and the layers cling together. It's ready when the pan is completely cool and the top springs back when pressed.
Step 10
Run a thin knife around the edge of the pan, turn the cake out onto a plate and slice it with an oiled knife or a clean piece of fishing line. A slick blade gives clean cuts without shifting the soft layers. The slices are ready when the cut faces are flat and show clear alternating purple and green stripes.
Equipment
- Steamer
- Round cake pan
- Blender
- Small saucepan
- Whisk
- Sieve
- Kitchen scale
- Mixing bowl
- Pastry brush
Tips
- Waxy taro has a nuttier taste and prettier color than watery taro; choose roots that feel heavy for their size with tiny purple flecks inside.
- For a deeper purple layer, you can add a little steamed purple sweet potato when blending the taro.
- Use the same ladle for every layer so all the layers end up the same thickness.
Storage
The cake is best at room temperature on the day it's made; just keep it covered so the top doesn't dry out. To keep it longer, wrap it in plastic wrap and refrigerate for up to three days, then steam it for a few minutes before serving to soften it.
Common problems and how to fix them
- The taro settles into a dense layer at the bottom of each tier.
- The taro wasn't blended smoothly enough or the batter wasn't stirred before ladling. Blend more thoroughly and stir the batter well every time you pour a new layer.
- The layers separate when you cut the cake.
- The top of the lower layer dried out or had water pooled on it before the next layer went on. Pour each new layer as soon as the previous one has just set on top, and wipe the lid often.
This recipe is based on the common ratios for this bake and is written entirely in our own words.