Icebox cake
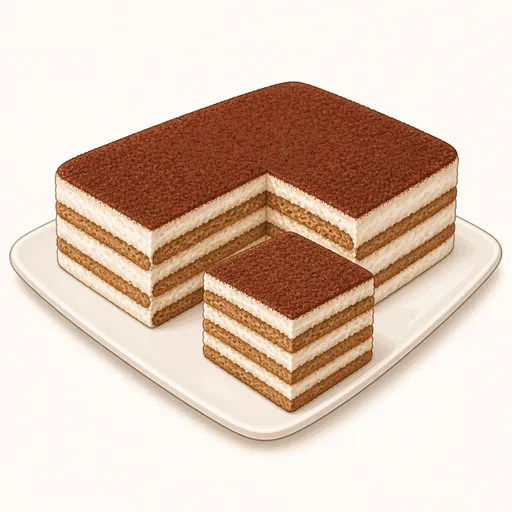
Icebox cake is a no-oven dessert: crisp biscuits are dipped quickly in coffee, then layered with fluffy whipped cream. After a night in the fridge, the biscuits soak up moisture and turn as soft as sponge cake, revealing beautiful stripes when you slice it.
- Difficulty
- Very easy
- Prep
- 25 min
- Cook
- 0 min
- Rising or chilling
- 8 hr
- Total time
- 8 hr 25 min
- Method
- Chilled
Ingredients
For the whipped cream
For the biscuit layers
For dusting
Instructions
Step 1
Pour 600 g well-chilled whipping cream into a chilled bowl, add 60 g powdered sugar and 5 g vanilla extract, and beat on medium speed for about four minutes. Cold cream holds air better, so the cream stands firm between the layers. The cream is ready when it reaches medium-stiff peaks and the trails left by the beaters keep their shape.
Step 2
Pour 150 g cooled brewed coffee into a shallow dish, then dip the 300 g plain tea biscuits in one at a time for about a second and lift them out right away. The biscuits only need a light soak on the surface; they'll absorb the rest of their moisture from the cream as they chill. They're ready when both sides have changed color but the centers are still firm.
Step 3
Spread a thin layer of cream over the bottom of the dish, cover it with a layer of dipped biscuits, spread about one-fifth of the cream on top, and repeat until everything is used up, finishing with a layer of cream. The thin layer of cream on the bottom keeps the cake from sliding when you cut it. The dish is ready when it has four to five layers of biscuits and the top layer of cream is smoothed flat.
Step 4
Cover the dish tightly with plastic wrap and refrigerate for at least eight hours, ideally overnight. The long chill is the secret that turns crisp biscuits into soft, cake-like layers. It's ready when a knife pressed down meets evenly soft layers with no crunch.
Step 5
Sift 10 g cocoa powder evenly over the top just before serving, then slice with a knife dipped in hot water and wiped dry after every cut. A warm knife cuts the cream cleanly and keeps the stripes between the layers sharp. The slices are ready when they stand upright and the cut side shows alternating brown and white stripes.
Equipment
- Rectangular pan
- Hand mixer
- Spatula
- Kitchen scale
- Mixing bowl
- Sieve
- Plastic wrap
- Refrigerator
Tips
- Marie biscuits are easy to find; you can also use thin chocolate wafers for a darker version.
- If you're making it for kids, swap the coffee for milk or a thin cocoa drink.
- Add a layer of thinly sliced bananas or strawberries between the cream layers for a fresher, fruitier cake.
Storage
Covered, the cake keeps for three days in the fridge, and the biscuits get softer the longer it sits. You can freeze it before dusting with cocoa for up to two weeks; move it to the fridge about three hours before serving.
Common problems and how to fix them
- The biscuits turn mushy and the cream gets watery.
- The biscuits soaked in the coffee too long. Dip them very quickly, for about a second, since they'll keep softening in the fridge.
- After a night in the fridge, the biscuits in the middle are still hard.
- The cream layers were too thin to give the biscuits enough moisture. Divide the cream more evenly between the layers and chill for a few more hours.
This recipe is based on the common ratios for this bake and is written entirely in our own words.