Japanese cotton cheesecake
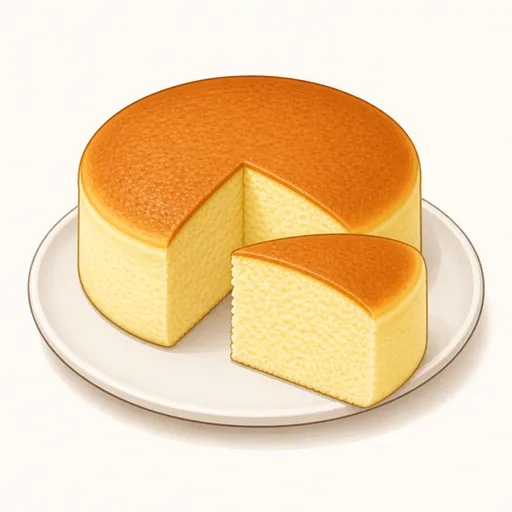
Japanese cheesecake, also called cotton cheesecake, is a cross between sponge cake and cheesecake: the crumb is soft and jiggly and melts in your mouth while still carrying a light, creamy cheese flavor. The secret lies in a meringue whipped to just the right point and a slow bake in a water bath at low heat.
- Difficulty
- Hard
- Prep
- 45 min
- Cook
- 1 hr 15 min
- Rising or chilling
- 4 hr 30 min
- Total time
- 6 hr 30 min
- Method
- Oven-baked
Ingredients
For preparing the pan
For the cheese mixture
For the whipped egg whites (meringue)
Instructions
Step 1
Brush a thin layer of unsalted butter (to taste) inside a round pan, line the bottom with parchment paper, and wrap the sides with a strip of parchment that stands about five centimeters above the rim. The cake rises above the pan as it bakes, so the paper collar helps it climb evenly without spilling over. The pan is ready when the paper sticks flat against the sides with no wrinkles or gaps.
Step 2
Preheat the oven to 160°C with a deep tray on the lower rack, and have a kettle of hot water ready. Baking in a water bath is essential for a soft, moist cake that doesn't dry out on top. The oven is ready once it has been heating for at least twenty minutes with the tray inside.
Step 3
Set a bowl holding 250 g cream cheese, 50 g unsalted butter and 100 g whole milk over a pan of barely simmering water on low heat, and stir until everything melts. Melting over a water bath makes the cheese smooth without scorching or clumping. The mixture is ready when it is as smooth as condensed milk, with no bits of cheese left, and only warm, about 50°C.
Step 4
Take the bowl off the heat and stir in 90 g egg yolks a little at a time, then sift in 35 g cake flour and 20 g cornstarch and add 15 g lemon juice and a pinch of salt. Cornstarch makes the crumb finer and softer than flour alone. The mixture is ready when it is pale yellow, glossy, and flows in a silky ribbon.
Step 5
Strain all of the cheese mixture through a fine sieve into a large clean bowl, gently pressing what's left in the sieve with a flat spatula. Straining removes any flour lumps and bits of egg, giving the cake a silky-smooth crumb. It's ready when the surface looks sleek and only a tiny bit of residue remains in the sieve.
Step 6
Beat 155 g cold egg whites with 1 g cream of tartar on low speed until foamy, then gradually sprinkle in 80 g superfine sugar and raise the speed to medium for about six minutes. The meringue only needs soft peaks; if it's whipped too stiff, the cake will crack as it rises. The meringue is ready when the peak on the lifted beaters curls over softly like a fishhook.
Step 7
Stir one-third of the meringue into the cheese mixture to lighten it, then pour all of the cheese mixture into the remaining meringue and fold very gently from the bottom up. Folding keeps the air bubbles that give the cake its fluffy, jiggly texture. The batter is ready when it is even in color and light, and a ribbon dropped on the surface slowly fades after a few seconds.
Step 8
Pour the batter into the pan and tap it gently to pop large bubbles, set the pan in the tray, pour in hot water to a depth of about two centimeters, and bake at 160°C for about 15 to 20 minutes. The higher heat at the start helps the cake rise and gives the top a lovely color. Move on when the top is a light golden brown and has risen above the rim of the pan.
Step 9
Lower the oven to 140°C and keep baking for about 45 to 55 minutes without opening the door. The low heat cooks the center slowly, keeping it moist and preventing cracks. The cake is done when the top springs back when pressed gently and a bamboo skewer inserted in the center comes out clean.
Step 10
Turn off the oven, prop the door open slightly, and let the cake rest inside for about thirty minutes before taking it out. The cake is very delicate, and cooling it gradually keeps shrinking to a minimum. It's ready when it has pulled away slightly from the sides of the pan; then turn it out onto a plate, peel off the parchment, and flip it back so the golden top faces up.
Step 11
Let the cake cool completely, then cover it and refrigerate for at least four hours before slicing. Chilling sets the crumb and deepens the cheese flavor. The cake is ready when the cut side looks smooth and moist and holds its shape.
Equipment
- Oven
- Round cake pan
- Baking sheet
- Hand mixer
- Whisk
- Spatula
- Sieve
- Small saucepan
- Parchment paper
- Kitchen scale
- Refrigerator
Tips
- The egg whites should still be cold when you whip them, so the meringue has small, stable bubbles and is less likely to be overwhipped.
- If your cakes tend to crack on top, lower the temperature for the first stage to 150°C and bake five minutes longer.
- Use a solid-bottom pan instead of a springform pan so water from the tray can't seep into the cake.
Storage
Covered, the cake keeps for four days in the fridge and is delicious cold. If you like it warm, microwave individual slices for about ten seconds to make the crumb soft and fluffy, as if fresh from the oven.
Common problems and how to fix them
- The top cracks wide open while baking.
- The meringue was whipped too stiff or the oven was too hot. Stop whipping while the peaks still curl softly, and check your oven temperature with a separate thermometer.
- There is a dense, yellow, jelly-like layer at the bottom of the cake.
- The meringue deflated or wasn't folded in evenly, so the heavy cheese mixture sank. Fold quickly but thoroughly until the batter is even in color, and get the cake into the oven right away.
- The cake shrinks a lot and the sides wrinkle after it comes out of the oven.
- The cake was underbaked or taken out of the oven too suddenly. Bake a few minutes longer at 140°C and always let the cake rest in the switched-off oven.
This recipe is based on the common ratios for this bake and is written entirely in our own words.