Butter mochi
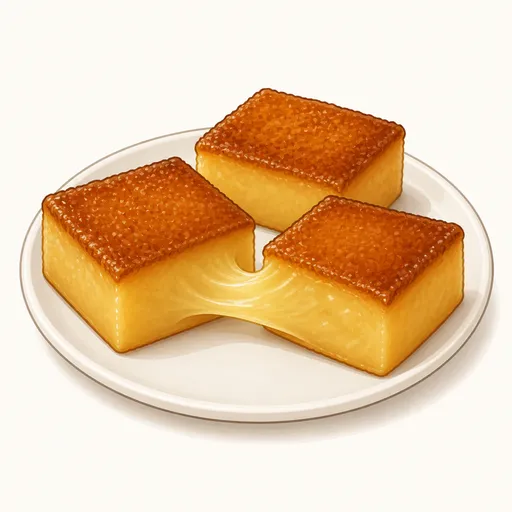
Butter mochi is a beloved Hawaiian baked treat that combines glutinous rice flour with butter, coconut milk and milk. It has crisp, caramelized edges, a chewy, mochi-like center and a rich coconut flavor. It's wonderfully simple to make: just mix everything in one bowl and pour it into the pan.
- Difficulty
- Very easy
- Prep
- 15 min
- Cook
- 1 hr 5 min
- Rising or chilling
- 2 hr
- Total time
- 3 hr 20 min
- Method
- Oven-baked
Ingredients
Batter
Butter for the pan
Instructions
Step 1
Preheat the oven to 175°C, line a 23 x 33 cm rectangular pan with parchment paper and brush to taste unsalted butter on the sides. Baked glutinous rice flour is very sticky, so the butter and parchment help you lift the mochi out easily. The pan is ready when the parchment covers the bottom and the sides shine with a thin layer of butter.
Step 2
Melt 115 g unsalted butter over low heat, then let it cool for about five minutes. Butter that's too hot can cook the eggs into lumps when you mix. The butter is ready when it's completely melted and the pan feels just warm to the touch.
Step 3
Beat 200 g eggs in a large bowl, add 400 g coconut milk, 350 g evaporated milk, 5 g vanilla extract and the melted butter, and whisk well. Mixing the liquids first helps them emulsify, so the mochi doesn't separate into an oily layer. The mixture is ready when it's a uniform cream color with no butter floating on top.
Step 4
Mix 450 g glutinous rice flour with 360 g granulated sugar, 8 g baking powder and a pinch salt, gradually pour in the liquid and stir until smooth, then pour into the pan. Adding the liquid little by little keeps the rice flour from clumping. The batter is ready when it's thin and creamy like heavy cream, with no dry lumps.
Step 5
Bake at 175°C on the middle rack for 60 to 70 minutes. The long bake cooks the chewy center through and caramelizes the edges into a crisp crust. The mochi is done when the top is a deep golden brown, the edges pull away from the pan and a skewer inserted in the center comes out free of wet batter.
Step 6
Set the pan on a rack and let the mochi cool completely, about two hours, before cutting. Warm mochi is very soft and sticky and only firms up once fully cool. It's ready when the bottom of the pan no longer feels warm and the top has firmed up.
Step 7
Lift the mochi out by the parchment and cut it into about twenty-four squares with a plastic knife or a lightly oiled metal knife. A plastic knife sticks less when cutting mochi. The squares are ready when the cuts are clean, showing a pale yellow, smooth and chewy center inside the brown edges.
Equipment
- Oven
- Rectangular pan
- Mixing bowl
- Whisk
- Small saucepan
- Kitchen scale
- Parchment paper
Tips
- Japanese mochiko gives the smoothest texture, but Thai or Vietnamese glutinous rice flour also works beautifully.
- Sprinkle desiccated coconut over the top before baking for a more fragrant, crunchy crust.
- If you prefer it less sweet, you can cut the sugar by about a fifth and the mochi will still stay chewy.
Storage
Wrapped tightly, butter mochi keeps at room temperature for two days and stays chewy. Avoid the fridge, as it hardens; if you've refrigerated it, warm it in the microwave for a few seconds to soften it again.
Common problems and how to fix them
- The center is still wet and gummy.
- The mochi didn't bake long enough or the oven wasn't hot enough. Bake it ten minutes longer and check your oven temperature with a thermometer.
- There's a layer of oil pooled on top after baking.
- The butter didn't blend with the other liquids. Whisk the eggs and milk thoroughly first, then pour in the butter slowly while whisking constantly.
This recipe is based on the common ratios for this bake and is written entirely in our own words.