Boston cream pie
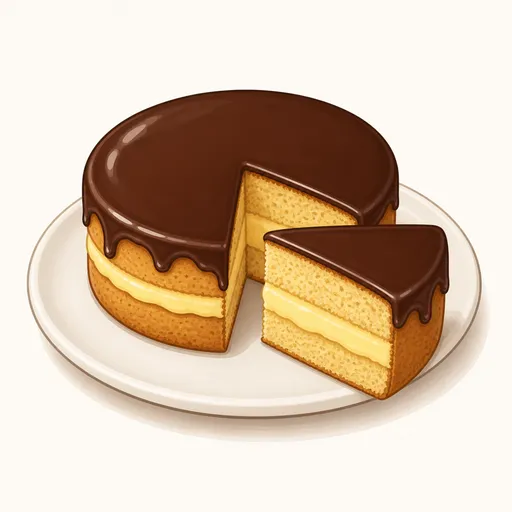
Despite its name, Boston cream pie is really two layers of soft sponge cake filled with silky vanilla pastry cream and topped with a glossy chocolate glaze. It was created at a Boston hotel in the nineteenth century and is now the official dessert of Massachusetts. Every slice brings together tender cake, creamy custard and gently bittersweet chocolate.
- Difficulty
- Medium
- Prep
- 50 min
- Cook
- 35 min
- Rising or chilling
- 3 hr
- Total time
- 4 hr 25 min
- Method
- Oven-baked
Ingredients
Sponge cake
Pastry cream
Chocolate glaze
Instructions
Step 1
Heat 360 g whole milk until steaming; meanwhile, whisk 72 g egg yolks with 75 g granulated sugar, 25 g cornstarch and a pinch salt, then slowly pour in the hot milk, return everything to the pot and stir constantly over medium heat. Adding the milk slowly warms the yolks gradually so they don't curdle into lumps. Once the cream has bubbled in the center for about a minute and is as thick as yogurt, turn off the heat and stir in 20 g unsalted butter and 4 g vanilla extract.
Step 2
Pour the cream into a clean bowl, press plastic wrap directly onto the surface and refrigerate for at least two hours. Wrap touching the surface keeps a dry skin from forming, and the chill makes the cream thick enough to fill the cake. The cream is ready when it's cold throughout and holds its shape on a spoon.
Step 3
Preheat the oven to 175°C, line the bottom of a 23 cm round pan with parchment paper and butter the sides. A fully hot oven before you whip the eggs means the batter goes in while it's at its airiest. The oven is ready after a full fifteen minutes of heating.
Step 4
Put 150 g eggs, 150 g superfine sugar and 4 g vanilla extract in a bowl and whip on high speed for about seven minutes, while you warm 100 g whole milk with 40 g unsalted butter in a separate small pot. The eggs need to expand several times over, since they're the main source of air that makes the cake light. The eggs are ready when the mixture is pale and thick and a line drawn across the surface doesn't fill in right away.
Step 5
Sift 140 g cake flour, 5 g baking powder and a pinch salt over the eggs and fold in two additions, then whisk about a cup of the batter into the hot milk and butter, pour it back into the bowl and fold a few more times. Mixing the milk with some batter first helps the liquid blend in evenly instead of sinking. The batter is ready when it's smooth, falls in a ribbon and shows no streaks of butter or dry flour.
Step 6
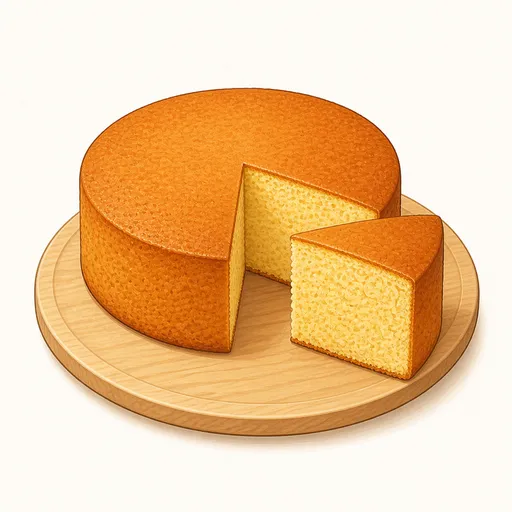
Pour the batter into the pan, level the top and bake at 175°C for about 25 to 30 minutes. A wide, shallow pan bakes quickly and evenly, so a single cake is all you need to split in two. The cake is done when the top is light golden brown, springs back when pressed gently and a toothpick inserted in the center comes out dry.
Step 7
Leave the cake in the pan for ten minutes, then turn it out onto a rack, peel off the parchment and let it cool completely, about forty-five minutes. A warm cake will turn the pastry cream runny when you fill it. The cake is ready when the center no longer feels warm to the touch.
Step 8
Use a serrated knife to slice the cake horizontally into two even layers, set the bottom layer on a plate, whisk the cold pastry cream until loose and spread it thickly on top, leaving a border of about one centimeter, then place the other layer on top. The border keeps the cream from squeezing out when you add the top layer and pour on the glaze. The cake is assembled when both layers sit flat and the cream shows as an even pale yellow stripe around the cake.
Step 9
Heat 120 g heavy cream over low heat until small bubbles appear around the edge, turn off the heat and pour it over 115 g finely chopped dark chocolate, wait two minutes, then stir from the center outward. Letting the chocolate sit in the heat before stirring helps the glaze melt smoothly without splitting. The glaze is ready when it's glossy, as thick as honey and feels just warm on your lip.
Step 10
Pour the chocolate glaze onto the center of the cake and use the back of a spoon to nudge it gently toward the edge, letting a little drip naturally down the sides. Pouring while the glaze is still warm lets it level itself and form pretty drips. The glaze is done when it covers the top completely, evenly thick and shiny as a mirror.
Step 11
Refrigerate the cake for about thirty minutes so the glaze sets and the filling firms up. A properly chilled cake cuts into neat slices without squeezing out the cream. The cake is ready when the chocolate no longer feels sticky to a light touch.
Equipment
- Oven
- Round cake pan
- Hand mixer
- Whisk
- Small saucepan
- Sieve
- Spatula
- Kitchen scale
- Mixing bowl
- Parchment paper
- Wire cooling rack
- Plastic wrap
- Refrigerator
Tips
- Make the pastry cream the day before to save time; after a night in the fridge it's thicker and easier to spread.
- Dip your knife in hot water and wipe it dry before each cut so the chocolate doesn't crack and the slices stay neat.
- If you prefer a less sweet glaze, choose a dark chocolate with sixty to seventy percent cocoa.
Storage
Because of the pastry cream, keep the cake in an airtight container in the fridge and finish it within three days. Before serving, let it sit out for about fifteen minutes so the cake softens and the chocolate glaze is less firm.
Common problems and how to fix them
- The pastry cream is lumpy, like scrambled custard.
- The yolks heated too quickly or you stopped stirring while it cooked. Strain the cream through a fine sieve while it's still hot, and next time pour the milk in very slowly and stir constantly along the bottom of the pot.
- The chocolate glaze split and turned grainy.
- The cream was too hot or a little water got into the chocolate. Stir in another tablespoon of cold heavy cream to bring the glaze back together, and next time heat the cream only until small bubbles appear.
This recipe is based on the common ratios for this bake and is written entirely in our own words.