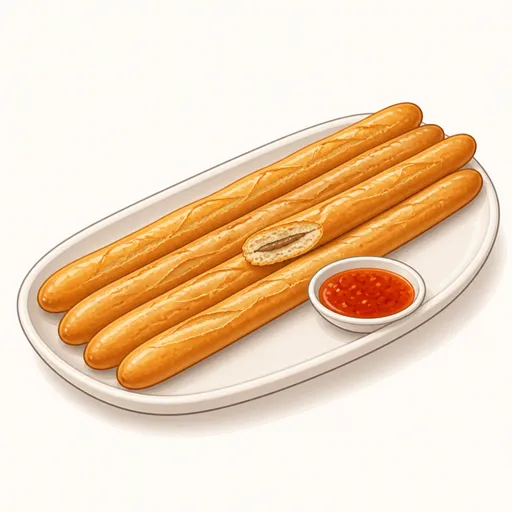
Stick bread with pate (banh mi que)
Banh mi que is a famous street snack from Hai Phong: long, slender loaves as thin as chopsticks with a shatteringly crisp crust and a thin crumb wrapped around a layer of rich pate. The bread bakes together with the filling, so the pate soaks into the crumb, and once you dip it in sweet, spicy chili sauce, you will not be able to stop.
- Difficulty
- Medium
- Prep
- 40 min
- Cook
- 14 min
- Rising or chilling
- 1 hr 40 min
- Total time
- 2 hr 34 min
- Method
- Oven-baked
Ingredients
Bread dough
Pate filling
Instructions
Step 1
Put 300 g bread flour, 4 g instant yeast, 10 g granulated sugar and 5 g salt in a bowl, pour in 185 g water and mix into a shaggy dough, then add 10 g vegetable oil and knead for about ten minutes. Thorough kneading makes the dough strong enough to roll into thin sticks without tearing. The dough is ready when it is smooth, elastic and stretches into a thin, translucent windowpane between your fingers.
Step 2
Shape the dough into a ball, place it in a bowl, cover with plastic wrap and leave it somewhere warm for about an hour. This rise lets the yeast build flavor and lightens the dough. The dough is ready when it has nearly doubled in size and small bubbles show on the surface.
Step 3
Mash 150 g liver pate with 20 g softened unsalted butter and a pinch of ground black pepper until they blend into a smooth mixture. The butter softens the pate so it spreads easily and makes the crumb rich and fragrant as it bakes. The filling is ready when it is smooth, lump-free and spreads as easily as soft butter.
Step 4
Divide the dough into twelve portions and roll each one into a thin strip about twenty-five centimeters long. Spread a line of pate filling down the middle, roll it up tightly to seal, roll it gently into a stick and place it seam side down on a lined baking sheet. Sealing well and keeping the seam underneath stops the filling from leaking as the bread rises in the oven. The sticks are ready when they are evenly long, about as thick as your thumb and have no gaps showing the filling.
Step 5
Cover the baking sheet loosely with plastic wrap and let the sticks rest for about thirty minutes. This final proof makes the crumb lighter and keeps the crust from splitting open in the heat. They are ready when the sticks have visibly puffed up and feel soft as a pillow when touched lightly.
Step 6
Preheat the oven to 220°C for about twenty minutes, with a small tray of water on the lowest rack. Steam in the oven keeps the crust soft for the first few minutes so the bread can rise fully before the crust sets. The oven is ready when the water tray is steaming gently and the heat indicator has turned off.
Step 7
Mist the tops of the sticks with a thin layer of water, then bake at 220°C for about 11 to 14 minutes. The water helps create the thin, crisp crust that Hai Phong stick bread is known for. They are done when the crust is evenly golden brown, sounds crisp when tapped and the ends are slightly darker.
Step 8
Move the bread to a rack, let it cool for about five minutes and eat it while still warm. Cooling on a rack lets the steam escape so the bottoms do not turn soft and damp. They are ready when the crust is still crackling crisp and the filling inside is still warm.
Equipment
- Oven
- Baking sheet
- Mixing bowl
- Bench scraper
- Rolling pin
- Parchment paper
- Plastic wrap
- Kitchen scale
Tips
- In Hai Phong, stick bread is usually dipped in chili sauce thinned with a little water, sugar and garlic, which you can make while the bread bakes.
- The thinner the sticks, the crisper the bread, but do not roll the strips thinner than three millimeters or they will be hard to seal around the filling.
- If you like heat, mix a little chili powder into the pate filling before spreading it.
Storage
The bread is best on the day it is baked; once cool, it keeps in a paper bag for about one day. Overnight the crust softens, but a few minutes at 180°C, about five, makes it crisp as new; you can also freeze the bread for up to two weeks.
Common problems and how to fix them
- The crust is soft and not crisp after cooling.
- The bread was not baked long enough or the oven was not hot enough. Bake two minutes longer and place the baking sheet on the middle rack so the heat spreads evenly.
- The pate filling leaks out and burns on the baking sheet.
- The seam was not pressed closed or there was too much filling. Use less filling at the ends of each stick and always place the seam face down on the baking sheet.
This recipe is based on the common ratios for this bake and is written entirely in our own words.