Bran muffins
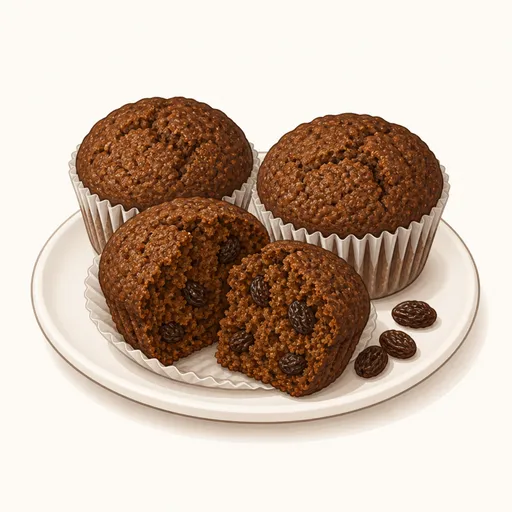
Bran muffins are a familiar breakfast treat in the United States and Canada, with the mellow sweetness of molasses and the toasty, nutty aroma of bran. Soaking the bran in buttermilk before mixing keeps the crumb soft and moist rather than dry, and chewy, sweet raisins turn up in every bite.
- Difficulty
- Very easy
- Prep
- 15 min
- Cook
- 20 min
- Rising or chilling
- 25 min
- Total time
- 1 hr
- Method
- Oven-baked
Ingredients
Bran soak
Batter
Instructions
Step 1
Put 90 g wheat bran in a large bowl, pour in 300 g buttermilk, stir so the bran is evenly moistened and let it sit for about ten minutes. Bran is very dry and needs time to absorb liquid; skip this step and the muffins turn out dry and gritty. The bran is ready when the mixture has swelled into a thick porridge with no milk pooling at the bottom of the bowl.
Step 2
While the bran soaks, preheat the oven to 200°C and line a twelve-cup muffin pan with paper liners. High heat at the start makes the muffins spring up quickly with nicely rounded tops. The oven is ready when the heating light switches off and the inside is evenly hot.
Step 3
Put 150 g all-purpose flour, 5 g baking soda, 4 g baking powder and a pinch salt in a separate bowl and whisk them together. Whisking first spreads the leaveners through the flour, so you don't get bitter spots or big holes. The dry mix is ready when it's an even color with no lumps.
Step 4
Crack 50 g eggs into the bowl of soaked bran, add 80 g brown sugar, 60 g molasses, 70 g vegetable oil and 5 g vanilla extract, and stir vigorously. Molasses and brown sugar give the muffins their deep brown color and signature caramel flavor. The mixture is ready when the molasses has fully blended in with no thick streaks stuck to the bottom of the bowl.
Step 5
Tip the dry ingredients into the bran bowl, fold a few times with a spatula, then scatter in 90 g raisins and fold two or three more times. Mix only until the dry flour disappears, because overmixing makes the muffins chewy with tunnels inside. The batter is ready when it's still slightly lumpy, thick and drops off the spatula in clumps.
Step 6
Spoon the batter into the paper liners until almost full, dividing it evenly among the cups. Bran muffin batter is thick and won't overflow, so filling the cups well gives tall, round tops. You've got it right when all twelve cups hold about the same amount and the batter mounds slightly.
Step 7
Set the pan on the middle rack and bake at 200°C for 16 to 20 minutes, rotating the pan after ten minutes if your oven heats unevenly. This temperature cooks the centers through before the molasses has a chance to burn. The muffins are done when the tops are lightly cracked, spring back when pressed and a bamboo skewer inserted in the center comes out with just a few moist crumbs.
Step 8
Leave the muffins in the pan for five minutes, then lift them onto a rack and wait about ten more minutes before eating. Resting lets the crumb settle so it doesn't stick when you peel off the liner. The muffins are ready when the bottoms of the liners are dry and peel away easily.
Equipment
- Oven
- Muffin tin
- Whisk
- Spatula
- Kitchen scale
- Mixing bowl
- Wire cooling rack
Tips
- If you don't have buttermilk, stir a tablespoon of lemon juice into regular milk and let it sit for ten minutes until it thickens slightly.
- Toasting the bran in a dry skillet for a few minutes before soaking makes the muffins much more fragrant and nutty.
- You can swap the raisins for chopped dates or add a handful of walnuts for a nutty crunch.
Storage
The muffins keep for two days at room temperature in an airtight container lined with paper towels. To keep them longer, wrap each one and freeze for up to a month, then just warm them in the microwave for about twenty seconds.
Common problems and how to fix them
- The muffins are dry and crumbly.
- The bran didn't soak up enough buttermilk or the muffins baked too long. Soak the bran for the full ten minutes and start checking the muffins at sixteen minutes.
- The muffins taste slightly bitter and have dark speckles.
- The baking soda wasn't mixed evenly into the flour or had clumped. Next time, sift the baking soda with the flour and whisk the dry ingredients thoroughly.
This recipe is based on the common ratios for this bake and is written entirely in our own words.