Chocolate sandwich cookies
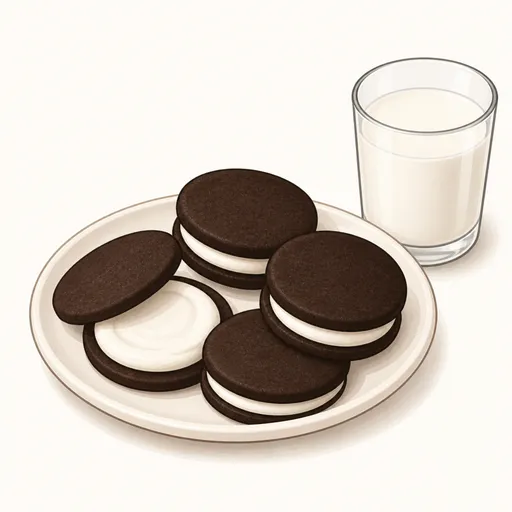
These chocolate sandwich cookies are a homemade take on the black-and-white cream-filled cookies everyone grew up with. Two thin, crisp chocolate wafers rich with cocoa hold a sweet, creamy vanilla buttercream filling. Making them at home lets you adjust the sweetness and the thickness of the filling and cut the cookies into any shape you like.
- Difficulty
- Medium
- Prep
- 45 min
- Cook
- 12 min
- Rising or chilling
- 1 hr 30 min
- Total time
- 2 hr 27 min
- Method
- Oven-baked
Ingredients
Chocolate cookies
Vanilla cream filling
Instructions
Step 1
Beat 140 g softened unsalted butter with 150 g granulated sugar for about three minutes, then add 50 g eggs and 4 g vanilla extract and beat until combined. Creaming the butter and sugar well gives the cookies a crisp, light snap instead of a hard bite. The mixture is ready when it is fluffy, smooth and paler than the butter was at the start.
Step 2
Sift 160 g all-purpose flour, 45 g cocoa powder, 2 g baking soda and 2 g salt into the butter mixture and mix on the lowest speed just until the dough comes together. Sifting removes lumps, since cocoa clumps very easily. The dough is ready when it is an even dark brown and forms a soft mass.
Step 3
Divide the dough in two, roll each portion between two sheets of parchment paper to about three millimeters thick, stack them on a flat tray and refrigerate for about an hour. Rolling before chilling gives you thin, even sheets of dough without dusting on extra flour. The dough is ready when it is firm and the paper peels off easily.
Step 4
Preheat the oven to 175 degrees Celsius and line a clean baking sheet with parchment paper. Chocolate cookies are hard to judge by color, so an oven at the right temperature helps you time them more accurately. The oven is ready after about fifteen minutes of preheating.
Step 5
Cut the cold dough with a round cutter about five centimeters across, place the rounds on the baking sheet two centimeters apart, then gather the scraps, roll them out again and chill before cutting more. Chilling the scraps again keeps the shapes as sharp as the first cut. You are done when you have an even number of identical rounds to pair up.
Step 6
Bake the cookies at 175 degrees Celsius for about 10 to 12 minutes. Because the cookies are already dark, rely on the surface and the aroma to tell when they are done. The cookies are ready when the tops are completely dry, have the faintest cracks and your kitchen smells of toasted cocoa.
Step 7
Leave the cookies on the baking sheet for five minutes, then move them to a rack and let them cool completely for about thirty minutes. The cookies only turn crisp once cool, and the filling will melt right away if they are still warm. The cookies are ready when they feel firm and crisp and do not bend.
Step 8
Beat 70 g softened unsalted butter until smooth, gradually add 180 g powdered sugar, 3 g vanilla extract and 10 g whole milk, then beat for about three minutes. Beating longer makes the filling whiter and velvety smooth. The filling is ready when it is ivory white and thick enough to hold its shape when piped.
Step 9
Spoon the filling into a piping bag with a round tip, pipe a dot of filling onto the center of the underside of half the cookies, then top with the remaining cookies and twist gently to spread the filling. A gentle twist as you press spreads the filling evenly without pushing it out the sides. The cookies are finished when the filling is an even layer sitting neatly about two millimeters in from the edge.
Equipment
- Oven
- Hand mixer
- Mixing bowl
- Spatula
- Sieve
- Kitchen scale
- Rolling pin
- Cookie cutter
- Baking sheet
- Parchment paper
- Wire cooling rack
- Piping bag
- Plastic wrap
- Refrigerator
Tips
- If you have black cocoa, a type of Dutch-process cocoa, swap it in for part of the regular cocoa to get the jet-black color of store-bought cookies.
- You can flavor the filling with a little matcha powder or peppermint extract for a change.
- Resting the filled cookies in the fridge for fifteen minutes firms up the filling so the cookies do not slide apart when you pick them up.
Storage
Keep filled cookies in an airtight container in a cool place and eat them within five days; in hot weather, store them in the fridge. Unfilled cookies stay crisp for up to two weeks in an airtight container.
Common problems and how to fix them
- The cookies taste bitter and slightly burnt.
- The cookies baked too long, because their dark color makes doneness hard to spot. Time them carefully and take them out as soon as the tops are just dry.
- The filling is too soft and oozes out.
- The butter was too soft or a little too much milk went in. Add a bit more powdered sugar and chill the filling for ten minutes before piping.
This recipe is based on the common ratios for this bake and is written entirely in our own words.